

Getting a commercial kitchen off the ground is a serious project, but you can boil it down to three main phases: design, permitting, and equipping. Following this blueprint is the key to making sure your Washington-based operation starts on the right foot, from nailing an efficient layout to passing those final, critical inspections.
Your Blueprint for a Successful Washington Kitchen
When you're launching a commercial kitchen in Washington, you absolutely need a roadmap. Think of this guide as that structure, walking you through everything from the initial design concepts that will keep the state health department happy to picking out the right gear and navigating the final sign-offs. A well-planned kitchen isn't just about satisfying inspectors; it’s about building a safe, productive, and profitable engine for your business that will serve you for years to come.
This visual gives you a clear, three-step look at the essential stages.
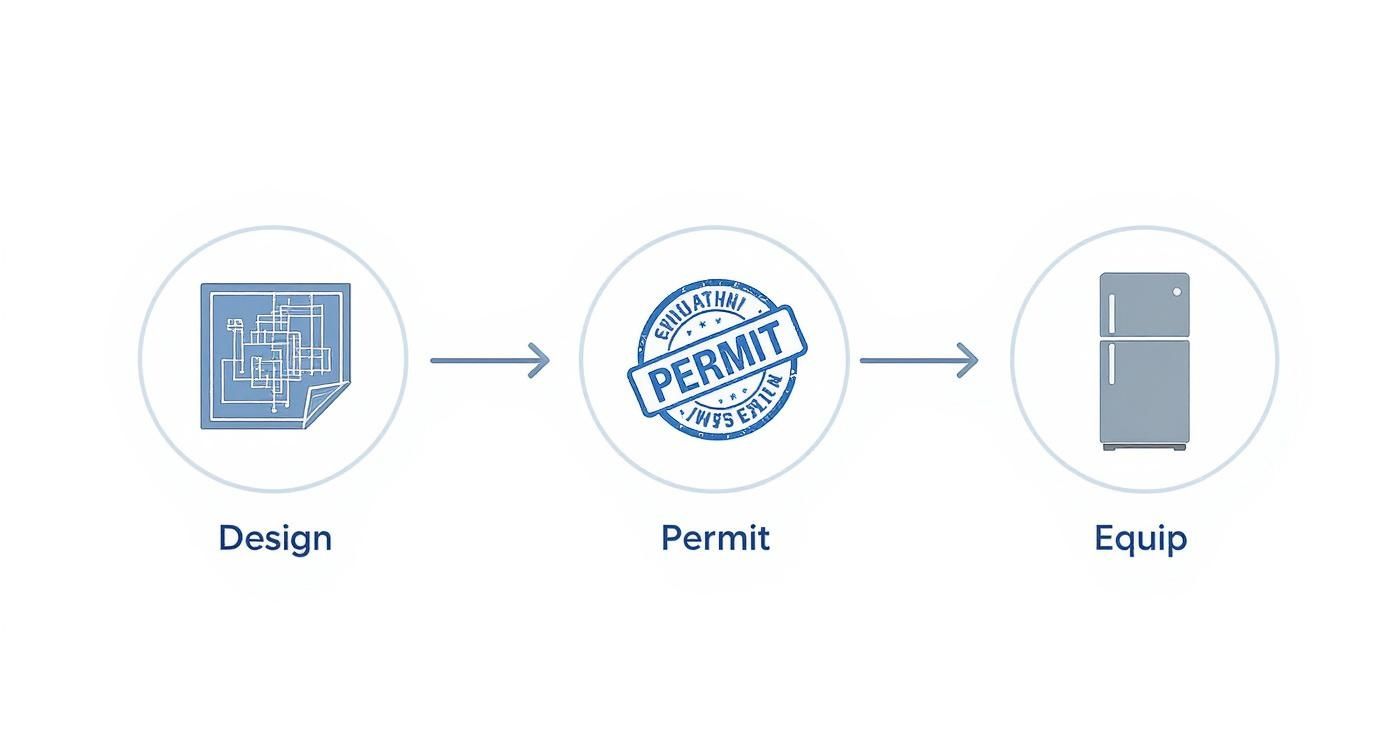
As you can see, equipping your space is the final, crucial piece of the puzzle—it all comes together once you have a solid design and approved permits in hand.
To help you stay organized, here's a quick look at how these phases break down.
Commercial Kitchen Setup Checklist
| Phase | Key Focus | Primary Outcome |
|---|---|---|
| Phase 1: Design & Layout | Workflow efficiency, compliance with health codes, utility placement (gas, water, electric), space optimization. | A finalized architectural plan and layout drawing ready for submission to local authorities. |
| Phase 2: Permitting | Submitting plans to health and building departments, addressing feedback, securing all necessary local and state approvals. | Approved permits that grant you legal permission to begin construction and installation. |
| Phase 3: Equipping | Selecting, purchasing, and installing all necessary cooking, refrigeration, prep, and storage equipment. | A fully functional, inspected, and compliant kitchen ready for operation. |
This checklist isn't exhaustive, but it covers the core milestones you'll need to hit to move from an idea to a fully operational kitchen.
The Foundation of Your Foodservice Operation
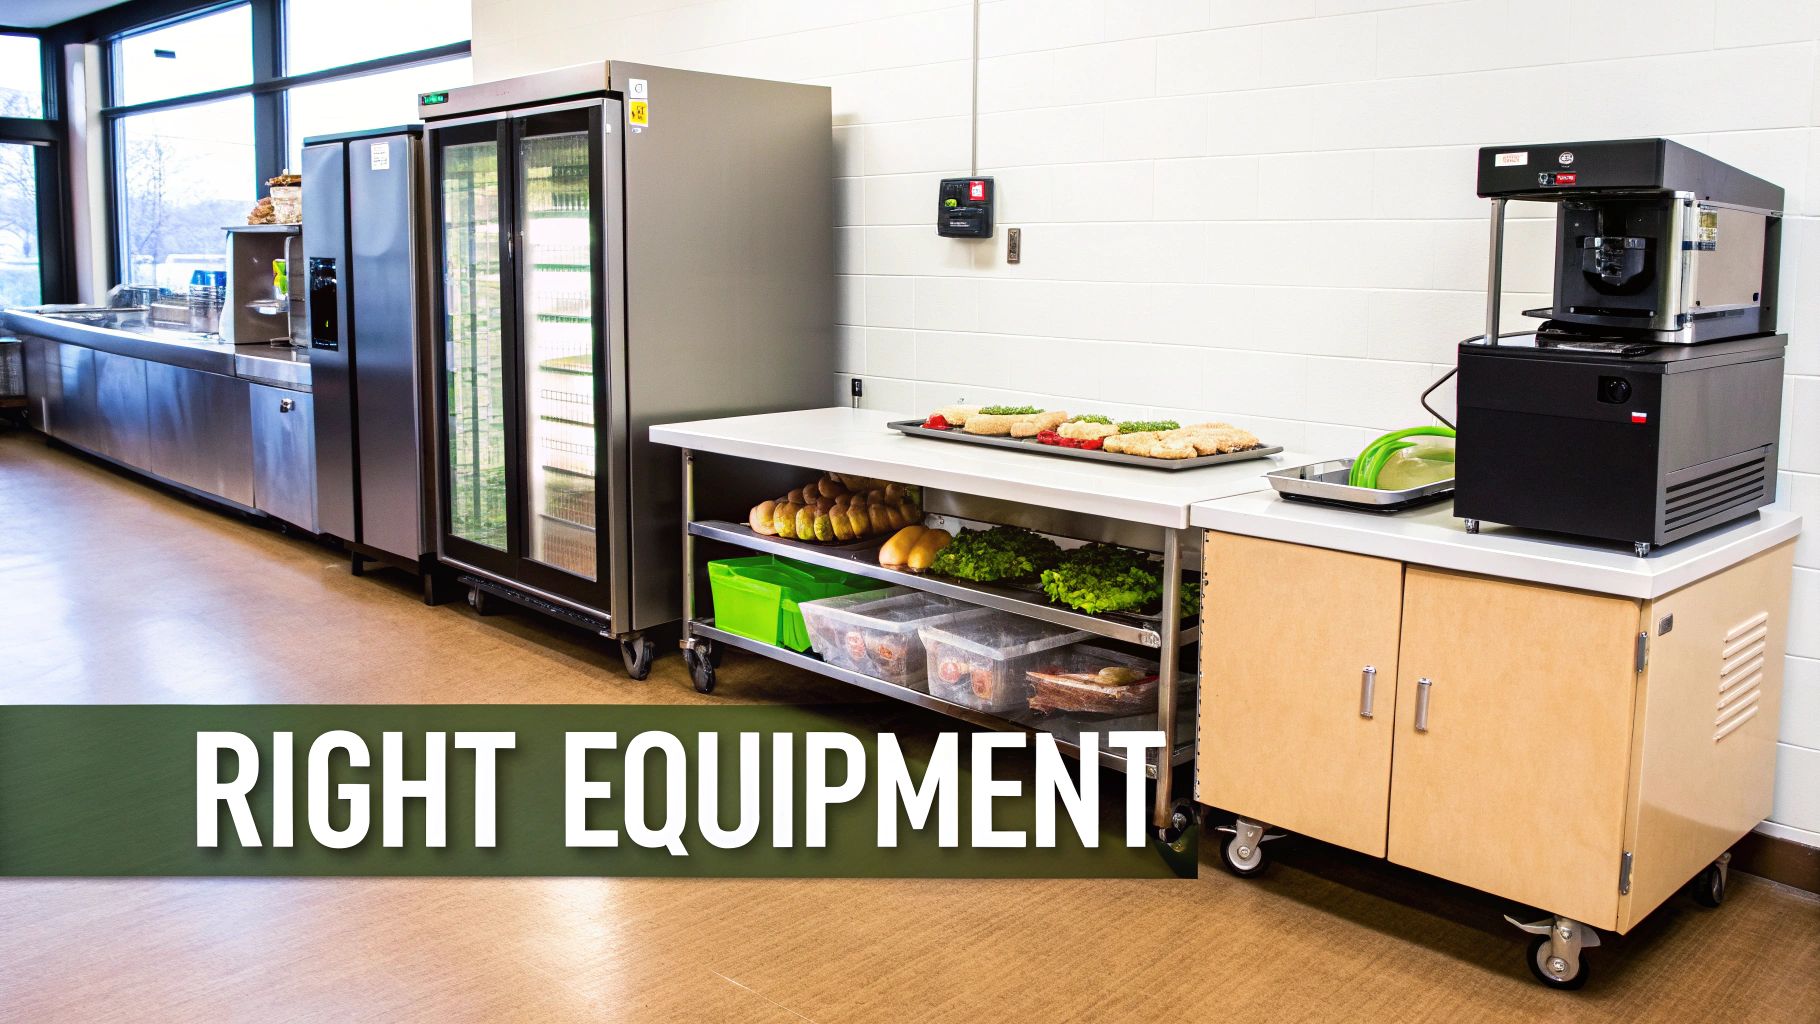
The equipment is the true heart of any successful restaurant, bar, or coffee shop. The choices you make here will directly define your day-to-day workflow, your monthly energy bills, and what you can realistically put on your menu. This is where you have to think strategically.
For most businesses in Washington, this starts with the basics: commercial refrigerators and commercial freezers to anchor the cold line. A busy Seattle coffee shop might lean toward space-saving under counter refrigerators or specific Seattle coffee shop refrigerators, while a pizzeria is going to need specialized pizza prep tables to keep their assembly line moving smoothly.
Equipping for Your Specific Menu
Once you have refrigeration covered, your menu dictates the rest of the investment. A high-volume diner simply can't function without powerful deep fryers, and a deli needs efficient sandwich prep tables. If you're running a bar, specialized Seattle bar equipment isn't just nice to have—it's essential for fast, consistent service. Every single piece, from under counter freezers to the main cooktop, has to work in harmony.
A classic mistake I see all the time is underestimating cold storage. It's always, always better to plan for a little more capacity than you think you need. It will save you from major operational headaches as your business scales up.
Thinking through these specific needs is a huge part of setting up your commercial kitchen. To get a real sense of what's out there, you can explore comprehensive guides for Washington restaurant equipment from local suppliers. Doing this research upfront ensures your budget and your layout can actually handle the machinery that's essential for your success.
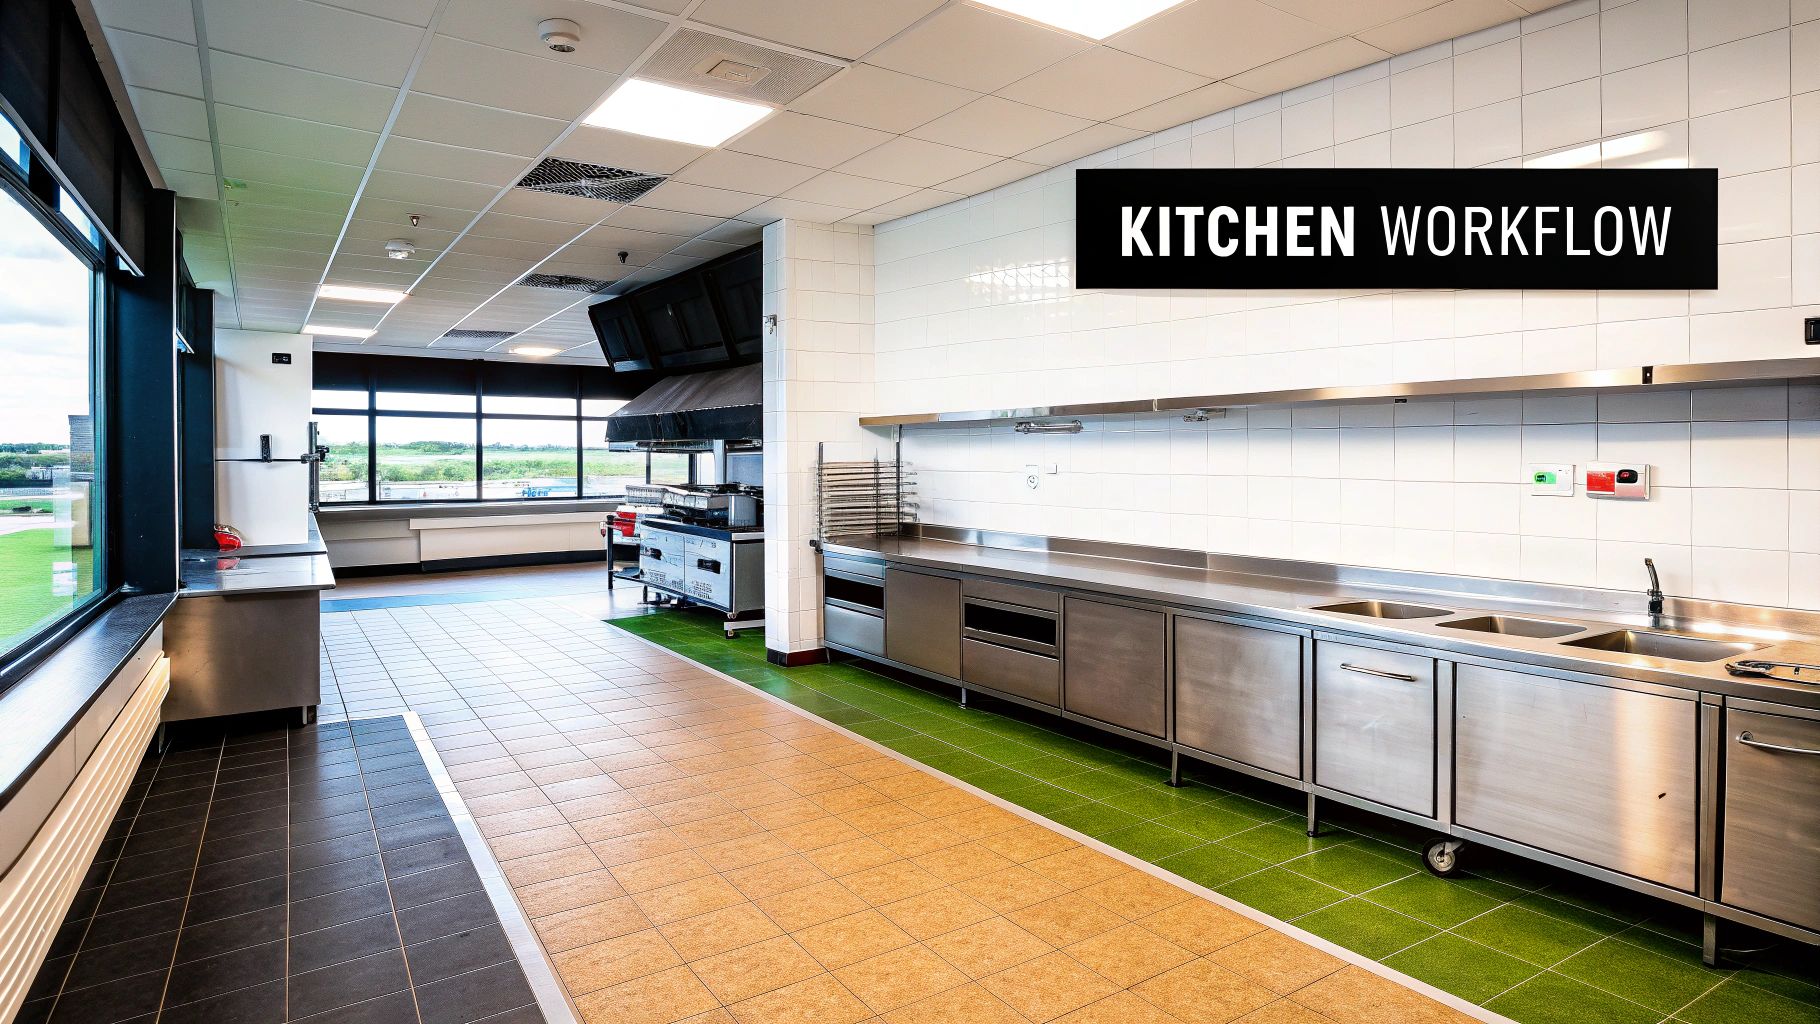
Designing for Workflow and Washington Health Codes
A great kitchen layout isn't just about where you stick the oven. It's the blueprint for your entire operation's efficiency. The goal is to create a seamless flow where ingredients, staff, and finished plates move in a logical path, from the back door to the customer's table. Getting this right from the start not only makes every shift smoother but also makes your health department inspection a much less stressful event.
Think of it as a one-way street: ingredients come in, get stored, prepped, cooked, and then served. The dirty dishes have their own path to the warewashing station. When you interrupt that flow, you get traffic jams during a dinner rush, creating bottlenecks and, more seriously, raising the risk of cross-contamination.
Choosing Your Kitchen Layout Style
Your menu and how you serve it are the biggest factors in deciding your kitchen's layout. There’s no single “best” design—only the one that’s best for your specific restaurant.
Three common setups tend to dominate the industry:
- Assembly Line Layout: This is perfect for places with a very linear process, like a pizzeria or a busy sandwich shop. Equipment is literally set up in the order you need it, which drastically cuts down on how much your staff has to move around and speeds up production.
- Island Layout: This design is a favorite in kitchens with a few chefs working at once. It puts the main cooking equipment—your ranges, grills, and fryers—in a central block, or "island," with prep stations and storage lining the walls. It really opens up communication and creates a central hub of action.
- Zone Configuration: If you’re running a large, complex menu, this is your best bet. You create distinct, self-contained stations for different tasks: a garde manger for cold prep, a grill station, a fry station, a plating area, and so on. This setup keeps different teams from tripping over each other.
Imagine your kitchen staff as performers. A well-designed layout is like a well-choreographed dance, giving everyone clear pathways to do their job. A bad layout forces them into a clumsy, chaotic mess every night.
Satisfying Washington Health and Safety Codes
Beyond simple efficiency, your design must comply with Washington State's health and building codes. These rules aren't suggestions; they're in place for public safety, and failing to meet them will stop your project dead in its tracks. Inspectors will be looking closely at your ventilation, plumbing, and the materials you use for surfaces.
Ventilation is easily one of the most critical—and expensive—parts of the build-out. A properly designed hood system is essential for pulling heat, smoke, and grease-filled air out of the kitchen, which is non-negotiable for fire safety and air quality. The global market for these systems is expected to jump from USD 4.88 billion in 2024 to USD 8.99 billion by 2035, showing just how crucial this technology is. For a standard restaurant, a complete system can easily run over USD 10,000, and in bigger kitchens, that number can climb to USD 50,000 or more.
A classic rookie mistake is buying all your cooking equipment before talking to an HVAC expert. The size and type of your Type 1 hood is determined by what's cooking underneath it. From a code standpoint, this is not something you can guess on.
Creating Zones to Prevent Cross-Contamination
Washington health codes are particularly strict about separating raw and ready-to-eat foods to stop foodborne illnesses before they can start. Your physical layout needs to make this separation obvious and easy to follow.
This means building clear, distinct zones into your floor plan:
- Receiving and Storage: This should be near your back door, giving delivery drivers a clear drop-off point that leads directly to your dry storage shelves, commercial refrigerators, and commercial freezers.
- Raw Food Prep: Have dedicated sinks, prep tables, and cutting boards just for raw meat, poultry, and fish. Keep this area completely separate from everything else.
- Cooking Line: This is your "hot line," where food gets cooked to safe temperatures.
- Plating and Service: A clean, sanitized area for the final touches before a dish is sent out to a customer.
- Warewashing: A designated space for dirty dishes, equipped with a three-compartment sink and/or a commercial dishwasher. Position it so that dirty plates never cross paths with clean ones or finished food.
By planning for a logical workflow and respecting health codes from day one, you build a kitchen that’s not just efficient, but fundamentally safe for your team and your guests.
Choosing Your Kitchen Equipment in Seattle
Alright, your layout is solid and the permits are in hand. Now for the fun part: picking out the hardware. This is more than just a shopping trip; it’s a major investment that will define your kitchen’s efficiency, your utility bills, and honestly, your team’s sanity during a busy service.
Your menu is the ultimate guide here. The gear needed for a high-end steakhouse is worlds away from what a bustling Seattle coffee shop requires. Working with a specialist like Seattle Restaurant Equipment means you’re getting commercial-grade equipment that’s actually built to take a beating, day in and day out.
Let’s get into the core categories and focus on making smart choices that will serve you well for years.
Anchoring Your Kitchen With Reliable Refrigeration
Refrigeration is the absolute heart of any kitchen. It’s where your expensive inventory lives, making it ground zero for food safety and quality. When you're looking at commercial refrigerators and commercial freezers, you need to think past just temperature. Consider the capacity, the footprint it'll take up, and how much it’s going to cost you to run.
Did you know an ENERGY STAR certified commercial refrigerator can save you an average of $170 a year on energy bills versus a standard model? That might not sound like a ton, but when you're running multiple units, those savings add up fast.
The most common mistake I see is operators buying refrigeration based solely on the lowest price. A cheap unit that constantly struggles to hold temperature or breaks down during a dinner rush will cost you far more in spoiled product and lost business than a quality unit ever would.
Think about the physical space you have to work with. A huge kitchen can easily fit large reach-in units, but a cozy urban café has to be more strategic. That’s where specialized and undercounter units really shine.
Specialized Refrigeration for Maximum Workflow
While general-purpose refrigerators are essential, specialized units are what really dial in your workflow. These pieces are smartly designed to combine cold storage with prep space, cutting down on the wasted steps your staff takes during service.
- Sandwich Prep Tables: A non-negotiable for delis and cafes. They keep all your meats, cheeses, and toppings perfectly chilled and right at your fingertips, just below a dedicated prep surface.
- Pizza Prep Tables: Built on the same idea but for pizzerias. They have a raised, refrigerated rail for easy access to toppings and a deep work surface—often marble—that’s perfect for stretching dough.
- Under Counter Refrigerators: These are the quiet heroes of tight kitchen layouts. Sticking an under counter refrigerator at a prep station means your cooks aren't constantly trekking to the walk-in, saving precious seconds on every single order.
- Under Counter Freezers: Same concept, but for frozen goods. An under counter freezer is ideal for keeping things like french fries, appetizers, or desserts right on the line where they're needed.
These aren't just gadgets; they're strategic tools for operational speed. To see how these might fit into your space, check out this great selection of specialized prep tables available in Seattle.
Equipping Your Seattle Bar or Coffee Shop
Beverage-focused businesses have their own unique refrigeration needs. A busy Seattle coffee shop, for example, needs specific Seattle coffee shop refrigerators. These are often glass-door models to show off grab-and-go items or undercounter milk coolers for quick barista access.
For a bar, proper Seattle bar equipment is everything. This can be anything from back-bar coolers that beautifully merchandise your bottles to direct-draw kegerators that guarantee the perfect pour. The right refrigeration keeps your product at its best and makes your bartenders’ lives a whole lot easier.
Commercial Refrigeration Selector Guide
Choosing the right refrigeration can feel overwhelming. This quick guide breaks down the most common types to help you match the equipment to your specific kitchen needs.
| Equipment Type | Best For | Key Feature | Space Consideration |
|---|---|---|---|
| Reach-In Refrigerator | General cold storage, holding bulk ingredients and prepped items. | High capacity, multiple shelving options for organization. | Requires significant vertical space and floor footprint. |
| Sandwich Prep Table | Delis, cafes, and kitchens with high-volume sandwich production. | Integrated refrigerated topping rail and cutting board. | Combines storage and prep space, optimizing line efficiency. |
| Under Counter Unit | Individual prep stations, bars, and coffee shops. | Fits beneath standard countertops, maximizing usable space. | Ideal for tight layouts and decentralizing cold storage. |
| Glass Door Merchandiser | Displaying drinks, grab-and-go meals, and retail products. | High visibility to encourage customer impulse purchases. | Best placed in customer-facing areas or service stations. |
Each piece serves a distinct purpose, and a well-planned kitchen often uses a combination of these to create the most efficient workflow possible.
Don't Forget the Hot Line Essentials
While cold storage is your foundation, the cooking line is where the action is. For many restaurants, a key piece of equipment is the deep fryer. When you're choosing one, look at its oil capacity, recovery time (how fast it reheats between batches), and whether gas or electric makes more sense for your setup.
High-volume kitchens usually lean towards tube-style gas fryers for their raw power and fast recovery times—a must for keeping up with orders of fries and wings. A dependable deep fryer is a workhorse that can become a serious profit center, making it a critical decision when setting up your commercial kitchen.
Budgeting and Financing Your Kitchen Equipment
Let's talk about the money. Outfitting a commercial kitchen is a serious financial step, and your most important tool isn't a chef's knife—it's a detailed, realistic budget. This isn't just about listing the big-ticket items. It’s about forecasting every single cost, from the walk-in cooler down to the last spatula, to build a financial plan that can handle the pressures of a new business.
The investment is substantial. The global market for commercial kitchen equipment hit around USD 98.34 billion in 2024, which gives you an idea of the scale we're talking about. For a small to mid-sized restaurant, the initial equipment cost can easily land between USD 50,000 and USD 200,000, and that number shifts based on how complex your menu is and where you're located.
That big number makes smart, strategic planning absolutely essential.
Forecasting Your Initial Equipment Costs
First things first: you need a comprehensive list of every single piece of equipment your kitchen needs to function. This list should be a direct reflection of your menu. A Seattle coffee shop has completely different needs than a high-volume pizzeria, so your budget has to be tailored to your specific concept.
Break it down by the major categories:
- Refrigeration: This covers your essential commercial refrigerators and commercial freezers. Don't forget specialized units like sandwich prep tables, pizza prep tables, under counter refrigerators, and under counter freezers.
- Cooking Line: List your primary workhorses, like ranges, ovens, charbroilers, and high-output deep fryers.
- Specialty Equipment: Think about items unique to your menu, like Seattle bar equipment or dedicated Seattle coffee shop refrigerators for milk and grab-and-go items.
- Warewashing: A commercial dishwasher, three-compartment sink, and drying racks are non-negotiable to meet health codes.
- Storage and Prep: This includes stainless steel work tables, shelving units, and all the necessary smallwares—pots, pans, knives, and storage containers.
Once you have your list, start researching prices from suppliers like Seattle Restaurant Equipment to get accurate, real-world numbers.
Accounting for Ongoing Operational Costs
The initial price tag is only one part of the story. Your equipment will have ongoing costs that hit your monthly bottom line, and you absolutely must factor these into your long-term financial plan.
Keep these key operational expenses in mind:
- Energy Consumption: Always look for the ENERGY STAR rating on things like refrigerators and ovens. An energy-efficient appliance might cost more upfront, but it can save you hundreds, even thousands, of dollars in utility bills over its lifespan.
- Maintenance and Repairs: Set aside a portion of your budget for routine maintenance and those inevitable unexpected repairs. A well-maintained deep fryer is far less likely to die on you during a Friday night rush.
- Consumables: This is everything from fryer oil and cleaning chemicals to the replacement water filters for your ice machines.
A critical mistake is focusing only on the sticker price. The true cost of a piece of equipment is its purchase price plus its lifetime operational and maintenance costs. A slightly more expensive, reliable unit is almost always the better long-term investment.
Exploring Your Financing and Leasing Options
Very few new businesses can afford to buy all their kitchen equipment with cash. Luckily, Washington entrepreneurs have several ways to fund their vision without completely draining their working capital.
- Traditional Business Loans: Banks and credit unions are a common source for small business loans. They often have competitive interest rates but usually require a rock-solid business plan and good credit.
- SBA Loans: These loans are backed by the Small Business Administration, which can make them more accessible for new ventures and sometimes offer more favorable terms.
- Equipment Leasing: Leasing is a fantastic option that lets you use the equipment for a fixed monthly payment without a huge upfront cost. At the end of the term, you might have the option to buy it, return it, or renew the lease.
Leasing is especially popular for startups because it preserves cash flow for other critical expenses like payroll, inventory, and marketing. Many suppliers offer financing programs to make the process simple. If you're looking for flexible funding solutions, you can learn more about restaurant equipment financing options that can help you get the gear you need to open your doors.
Understanding the pros and cons of each financing path empowers you to make the best decision for your kitchen's financial health.
Managing Procurement and Installation Logistics
You've got your equipment list finalized and the money is in the bank. Now comes the really fun part: turning all those orders into a real, working kitchen. This is where the logistics get serious. Handling the procurement and installation correctly is what separates a smooth opening from a nightmare of costly delays.
The secret? It's all about precise coordination. You can't just have a deep fryer or a commercial refrigerator show up whenever the shipping company feels like it. Everything has to land on-site in perfect sync with your construction schedule. This is where working with a supplier like Seattle Restaurant Equipment really pays off, because we can help you build a delivery timeline that actually works. Think about it: you don't want your brand new sandwich prep tables sitting in the middle of a dusty floor while electricians are still pulling wire.
Coordinating Deliveries with Your Timeline
Timing is absolutely everything. The goal is to have equipment arrive after the heavy-duty construction, flooring, and utility rough-ins are done, but before the final finishes go on. A delivery that's off by even a day can damage your new gear or block other trades from getting their work done, creating a domino effect of delays that bleeds your budget dry.
The best way to handle this is by staging your deliveries. We've seen this work time and time again:
- Big, stationary items come first. This is your walk-in cooler, ventilation hoods, and large ranges. These are the beasts that are hardest to move, so they need to be set in place early on.
- Next up: the refrigeration and cooking line. Your core workhorses like commercial freezers, ovens, and pizza prep tables can roll in after the big stuff is settled.
- Mobile and countertop units are last. Bring in the smaller items, shelving, and countertop equipment at the very end. This keeps them out of the way, preventing clutter and damage during the main installation chaos.
This staged approach keeps your job site from turning into an obstacle course and makes the whole build-out process a lot smoother.
Preparing for Delivery Day
When that truck finally pulls up, you have to be ready. A few minutes of prep can save you hours of pain. Before the driver is even on their way, walk the path from the curb to the kitchen. Is it clear? Are there any obstructions? You need to measure every doorway, hallway, and tight corner to make damn sure that new under counter refrigerator is actually going to fit.
Once the equipment is off the truck, the inspection starts. Do not skip this.
Before you even think about signing that delivery receipt, inspect every single item. Look for dents, scratches, broken glass—anything. If you see something, take photos and write a detailed note on the bill of lading before the driver leaves. If you sign off clean, you’re telling them you accept the equipment as-is, damage and all.
This one simple step is your best protection. It ensures you don't get stuck with someone else's mistake.
The Critical Installation Phase
Finally, it's time to get everything hooked up. This is not a DIY project. Ever. All gas, electrical, and plumbing connections for your Seattle bar equipment or Seattle coffee shop refrigerators must be handled by certified, licensed technicians. Trying to save a few bucks with an unqualified installer can void your warranties, get you in trouble with local building codes, and create massive safety hazards.
Professional installation is your guarantee that everything from your under counter freezers to your main cook line is connected properly, calibrated correctly, and operating safely. It’s the last essential step in turning that empty space into a fully commissioned, inspection-ready commercial kitchen.
Passing Final Inspections in Washington State
Your kitchen is built, the equipment is in place, and the finish line is in sight. But before you can unlock the doors and start serving, you’ve got one final hurdle: passing your inspections. This isn't about buying more gear; it's about proving that everything you already have is installed correctly, works perfectly, and meets Washington State's rigorous safety codes.
This final check-up is called commissioning. It's your last chance to find and fix any issues before they become a nightmare during a packed dinner service.
What Commissioning Really Looks Like
Think of commissioning as a full-scale dress rehearsal for your kitchen. You're not just flipping switches—you're methodically testing every single appliance to make sure it's ready for the chaos of a live service. It’s a crucial, detailed verification process.
So, what does that actually involve?
- Refrigeration Calibration: Power up every single one of your commercial refrigerators and commercial freezers. Don't just trust the built-in display; use a separate, calibrated thermometer to verify they’re holding the right temperature. This goes for everything, from your walk-in to your sandwich prep tables, pizza prep tables, and every last under counter refrigerator.
- Cooking Equipment Tests: Bring your deep fryers up to heat and double-check their thermostat accuracy. Run your ovens through a full heating cycle to ensure they reach and hold the correct temperature without any wild swings.
- Ventilation Verification: Fire inspectors live and breathe ventilation. Your hood system is one of their top priorities. A simple "smoke test" (using a non-toxic smoke pencil) is a great way to visually confirm that it's properly pulling smoke and heat away from all your cooking surfaces.
Getting Ready for the Health and Fire Inspector's Visit
Washington inspectors are sharp, and their job is to protect the public. A failed inspection means a delayed opening and lost revenue, so being over-prepared is the only way to go. They’ll look at everything, but some areas get way more attention than others.
Your equipment is a huge part of this. The global market for commercial kitchen appliances is on track to hit USD 166.3 billion by 2034, and a big driver of that is the need for reliable, compliant units. Here in North America, restaurant operators are investing anywhere from USD 75,000 to USD 300,000 for a complete kitchen setup to meet these strict standards. You can dive deeper into these numbers by checking out this commercial kitchen appliances market report.
One of the most common—and easily avoidable—reasons for a failed health inspection is bad temperature control. Before the inspector even walks in the door, make sure there’s a working, visible thermometer inside every cold-holding unit you own. That means your walk-in, your reach-ins, and even your Seattle coffee shop refrigerators.
Use this quick checklist to make sure you're ready:
- Confirm all under counter freezers and refrigerators have those visible, functioning thermometers.
- Check every hand-washing and food-prep sink to ensure you have both hot and cold running water.
- Make sure the fire suppression systems above your cook line are certified, with the tag clearly visible.
- Wipe down and test all your Seattle bar equipment to ensure it's clean, sanitary, and working as it should.
By methodically commissioning your kitchen and running through this checklist, you can face that final walkthrough with confidence. You'll know your operation is safe, compliant, and ready to launch.
Still Have Questions? We've Got Answers

Getting a commercial kitchen off the ground is a huge undertaking, and it’s natural to have a lot of questions. We see the same ones pop up time and again from new owners, so let's tackle a few of the big ones right here.
Where Do I Even Begin When Setting Up a Commercial Kitchen?
The absolute first move, before you even think about a location or a single piece of steel, is to lock down your menu and business plan. Seriously. Your menu is the blueprint for everything else.
What you plan to cook dictates the equipment you need, which then dictates your kitchen’s layout, workflow, and total budget. Skipping this foundational step is a surefire way to end up with costly equipment you don’t need or a layout that just doesn't work.
What's the Real Cost to Equip a Kitchen in Seattle?
This is the million-dollar question, isn't it? The truth is, the cost swings wildly depending on your kitchen's size and what you're serving. For a small or mid-sized restaurant, you're likely looking at a range between $50,000 and $200,000 for the core equipment package.
That number covers the big-ticket items—your ovens, commercial refrigerators, dishwashers, and crucial ventilation systems. It also includes the workhorses like deep fryers, under counter freezers, and specialty units like pizza prep tables. A good supplier can help you navigate this and find the right balance between quality and budget.
What are the Most Common (and Costly) Kitchen Layout Mistakes?
We see a few recurring nightmares. The biggest is easily a poorly designed workflow. If your team is constantly crossing paths or walking too far between stations, you're bleeding time and money during every service.
Another classic mistake is not planning for enough storage—both for dry goods and refrigerated or frozen ingredients. You can never have too much storage.
But the one that really derails an opening is messing up the utility placement and ventilation. Getting this wrong often means expensive retrofits to pass inspection, which can set your grand opening back by weeks or even months.
Finally, don't cripple your team from day one by picking the wrong specialized gear. A deli needs proper sandwich prep tables, and a bar needs the right Seattle bar equipment to be efficient. A little extra planning here saves a world of operational headaches later.
At Seattle Restaurant Equipment, we've helped countless Washington foodservice businesses get started with high-quality, reliable appliances. From the most basic commercial freezers to specialized Seattle coffee shop refrigerators, we deliver dependable solutions with fast, free shipping across the state.
Take a look at our full catalog and let's get your kitchen equipped for success. Just visit us at seattlerestaurantequipment.com.