

Keeping your commercial fryer clean isn't just a box to check off at the end of the night—it’s a non-negotiable task that has a huge impact on your food quality, kitchen safety, and ultimately, your bottom line. Think of it as a core business function, one that protects your expensive equipment and prevents serious headaches like fire risks or health code violations.
Why Smart Fryer Cleaning Is a Business Imperative
Let's be honest—no one loves cleaning the fryer. But for any restaurant owner in Washington, from a packed Seattle bistro to a local Spokane food truck, this is one of the most critical jobs in the kitchen. It’s not just about hygiene; it’s about safety, the taste of your food, and your profitability.
Putting it off leads to serious fire hazards, makes your food taste funky, and will absolutely cause expensive equipment failures down the line. This guide is all about practical, no-nonsense advice to get it done right. We’ll show you how to maintain your deep fryers and other essential gear, pulling from real-world experience and suppliers like Seattle Restaurant Equipment who know what a professional kitchen truly needs.
The True Cost of Neglect
Ignoring your fryer doesn't just mean a dirty vat of oil. That old, broken-down oil and carbon buildup will completely ruin the flavor of your fried items, which leads straight to customer complaints and wasted food. Even more important, it creates a massive safety risk.
The National Fire Protection Association (NFPA) isn't messing around here. Their data shows that cooking equipment is the cause of over 60% of the 7,410 fires that happen in restaurants every year, with deep fryers being the number one culprit. These fires result in an average of $165 million in property damage annually. It's a sobering reminder of what's at stake.
A clean fryer is a safe fryer. All that grease and carbon gunk that builds up in a poorly maintained unit is incredibly flammable. It can turn a vital piece of kitchen equipment into a serious fire hazard in no time.
Protecting Your Entire Kitchen Investment
When you commit to keeping your fryers clean, you're setting a high standard for your whole operation. The same logic of routine care applies to all the workhorses in your kitchen, making sure they last longer and perform better.
This includes equipment like:
- Refrigeration Units: Keeping coils clean on commercial refrigerators, commercial freezers, and Seattle coffee shop refrigerators prevents them from overheating and failing.
- Prep Tables: Wiping down sandwich prep tables and pizza prep tables every night is crucial for preventing cross-contamination and staying on the right side of the health department.
- Bar & Beverage Equipment: Properly maintaining your Seattle bar equipment means your drink service keeps running smoothly without surprise breakdowns during a rush.
At the end of the day, a dirty fryer is a symptom of a larger problem. Building consistent cleaning habits for all your equipment is fundamental. Even something as simple as proper waste disposal, like understanding correct grease trap sizing, is part of running a compliant, well-oiled machine. This guide will give you the framework to build those essential habits.
Gathering Your Essential Cleaning Tools
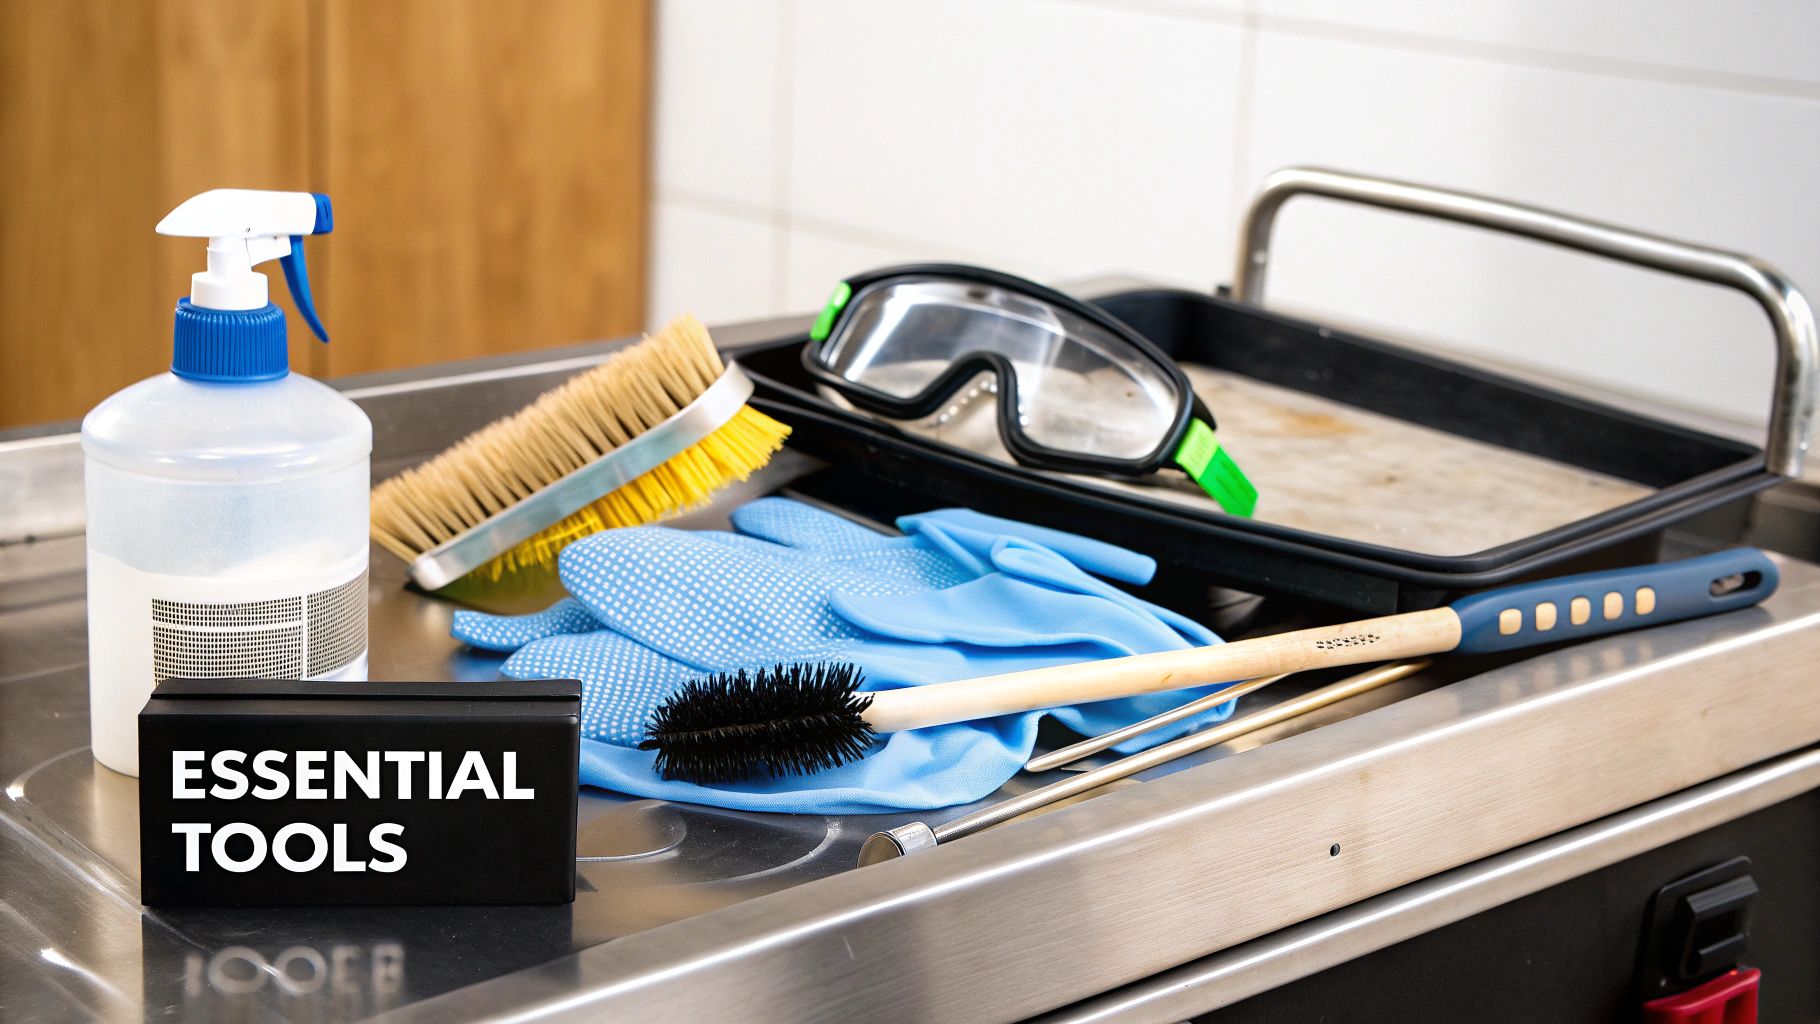
Trying to clean a commercial fryer without the right gear is a recipe for disaster. It’s not just inefficient—it’s a major safety risk. Before a single drop of oil is drained, you absolutely must have a dedicated toolkit assembled and ready to go.
This isn't just about making a chore easier. For kitchens across Tacoma, Bellevue, and Kent, being prepared means your team can handle everything from daily wipe-downs to full deep cleans without cutting corners. The right tools prevent shortcuts that always lead to bigger, more expensive problems down the line.
Protecting Your People First
Let's be clear: safety is non-negotiable when you're working with scalding oil and powerful cleaning agents. Personal Protective Equipment (PPE) is the first thing you need to get in order. When you equip your staff properly, you're not just complying with regulations; you're showing them you value their well-being.
Your non-negotiable PPE list includes:
- High-Temperature Gloves: Those standard yellow dishwashing gloves aren’t going to cut it here. You need heavy-duty, insulated gloves that can handle an accidental splash of hot oil or boiling water.
- Safety Goggles or a Face Shield: A splash of hot grease or caustic cleaner to the eyes can cause serious, permanent damage. Goggles are your best bet because they create a seal.
- Waterproof Apron: A heavy-duty apron is your first line of defense, protecting both your uniform and your skin from grease, hot liquids, and chemicals.
These items are what stand between your employee and a trip to the emergency room. Never, ever start a fryer clean without them.
Assembling the Right Tools for the Job
Once everyone is protected, you need the right implements to actually fight the grease and carbon. Using whatever is lying around—like a grill brush or a regular sponge—is a surefire way to either damage your fryer or do a poor job.
Having a designated fryer cleaning kit is a game-changer. It eliminates the time wasted searching for tools and ensures your team always uses the correct, non-damaging equipment for the task. This simple step streamlines the entire commercial fryer cleaning process.
The workhorse of your kit is a long-handled fryer brush. Its stiff bristles are designed to scrub the vat walls without scratching the stainless steel. You'll also need a fryer clean-out rod to poke through the drain line and clear out any hardened gunk. Clogs are messy, dangerous, and completely avoidable with this simple tool.
Add some non-abrasive scrubbing pads for the finer details and a big stack of clean, lint-free cloths for wiping everything down.
Most importantly, you need a commercial-grade boil-out solution. This isn't just soap. These cleaners are specifically formulated to break down that tough, polymerized grease that regular detergents can't touch. You can find all these professional supplies right here at Seattle Restaurant Equipment, ensuring your whole kitchen—from your pizza prep tables to your electric commercial deep fryers—is maintained to the highest standard.
Your Commercial Fryer Cleaning Toolkit Checklist
To make things simple, we've put together a checklist of everything you'll need. Think of this as your go-to list to make sure your cleaning station is always stocked and ready for action.
| Supply or Tool | Purpose in Cleaning | When to Use It | Key Safety Tip |
|---|---|---|---|
| High-Temp Gloves | Protects hands from hot oil, water, and chemicals. | Every clean | Ensure they are rated for temperatures above 400°F. |
| Safety Goggles | Shields eyes from splashes of liquid and chemicals. | Every clean | Wear them from start to finish, even during wipe-downs. |
| Waterproof Apron | Protects body and clothing from grease and chemicals. | Every clean | Check for rips or tears before each use. |
| Fryer Brush | Long-handled brush to scrub inside the fry pot. | Weekly & Deep Clean | Use a brush with non-abrasive bristles to avoid scratching. |
| Clean-Out Rod | Clears clogs and debris from the drain line. | Weekly & Deep Clean | Never force the rod; gently poke to clear obstructions. |
| Non-Abrasive Pads | For detailed scrubbing on surfaces and baskets. | Daily, Weekly, Deep | Avoid steel wool, which can damage stainless steel. |
| Boil-Out Cleaner | Chemical solution designed to dissolve carbonized grease. | Deep Clean | Always follow the manufacturer’s dilution instructions precisely. |
| Scrapers | Plastic or metal tools for removing thick, caked-on grease. | Deep Clean | Use plastic scrapers on delicate surfaces to prevent damage. |
| Dedicated Buckets | For mixing cleaning solutions and discarding waste. | Every clean | Label them "FRYER ONLY" to prevent cross-contamination. |
| Lint-Free Cloths | For drying and polishing the fryer after cleaning. | Every clean | Ensures a streak-free finish and no leftover fibers. |
Keeping these items organized in a designated bin or cart makes the whole process smoother and reinforces a culture of safety and professionalism in your kitchen.
Building the Daily Shutdown and Cleaning Habit
The real secret to a long-lasting fryer isn't some huge, once-a-year deep clean. It's all about the simple, consistent habits you build into your kitchen's daily shutdown. A smart end-of-day process stops grime from ever taking hold, which makes those weekly boil-outs much less of a headache.
This isn’t about adding an extra hour to your closing shift. It’s a quick, ten-minute ritual that saves you time, makes your cooking oil last longer, and protects your equipment. For any busy Washington kitchen, this is a genuine cost-saver.
The Initial Shutdown and Cooling Period
Before you even grab a cloth, safety comes first. Start by turning the fryer completely off. If you've got a gas model, make sure the pilot light is out and the gas valve is shut. For electric units, just switch it off and unplug it if you can.
You should never, ever put water or cleaning solutions into hot oil. This is a critical safety rule that prevents dangerous flare-ups and steam explosions. Let the oil cool down to a safe temperature—ideally below 150°F. This cooling time is perfect for getting other closing tasks done, like wiping down your commercial refrigerators or cleaning out the sandwich prep tables.
Skimming and Surface Wiping
Once the oil is cool enough to handle, the real work starts. Your goal is to get rid of as much free-floating debris as you can. Those tiny bits of food are what really break down your oil, making it dark, smoky, and giving your food an off-taste.
Grab a fine-mesh skimmer and carefully filter out all the crumbs. Take your time with it, scraping along the sides and bottom of the fry pot. The more gunk you get out now, the longer your oil is going to last.
Think of daily skimming as basic upkeep for your oil. Every particle you pull out is one less thing to burn and ruin the oil quality, which directly affects your food cost and how good your product tastes.
After skimming, it's time to wipe down the outside. Use a clean, damp, lint-free cloth on all the stainless steel surfaces. Don't use abrasive sponges or steel wool, as they’ll scratch up the finish. A simple mix of warm water and a mild, food-safe soap is all you need. Pay close attention to the backsplash and the areas around the controls where grease likes to build up.
Quick Component Check and Final Polish
With the inside skimmed and the outside clean, take thirty seconds for a quick look-over. This is a great habit to get into because it helps you spot small issues before they turn into big problems.
- Baskets: Check for any broken wires or heavy carbon gunk that will need extra scrubbing during the next deep clean.
- Heating Elements: Look for a lot of carbon buildup on the elements (in tube-type fryers). If you see it, you know a boil-out is due.
- Drain Valve: Make sure the drain valve is shut tight and not leaking.
Finally, place the cover over the fry pot. This keeps dust, debris, and pests out overnight, so your oil is clean and ready for tomorrow's service. This simple step is just as important for your deep fryers as it is for keeping pizza prep tables covered or your under counter freezers sealed. It's all part of running a professional, hygienic kitchen.
This whole daily ritual is about being consistent. It sets a standard of cleanliness for all your equipment, from your Seattle bar equipment to your coffee shop's refrigerators. By making these small steps part of your closing routine, you build a system that keeps your kitchen running smoothly.
Executing a Flawless Weekly Fryer Boil-Out
Your daily wipe-downs are the first line of defense, but the weekly boil-out is the main event. This is where you really go to war against the tough, carbonized gunk that builds up over time. Getting this heavy-duty cleaning process right is what keeps your fryer running like a champ, makes your food taste consistently great, and helps you get years of life out of your equipment.
It might look like a lot of steps, but once you get a rhythm down, it just becomes another part of the weekly close-out. A proper boil-out is just as critical as keeping your commercial freezers organized or your sandwich prep tables spotless.
Think of your daily cleaning routine as the foundation for a successful weekly deep clean.

This quick visual shows how those simple daily tasks—shutting down, skimming, and wiping—prevent small messes from escalating into a weekend-long project.
Draining and Handling Used Oil Safely
First things first: you have to get the old oil out. Always make sure the fryer is off and the oil has cooled to a safe handling temperature, which is ideally below 150°F. Grab a large, heat-resistant container—clearly labeled for used oil—and place it under the drain spout before you even think about opening that valve. Then, open it slowly.
Once it's all drained, you need to deal with the oil according to Washington's state and local rules. Pouring used cooking oil down any drain is illegal and a huge mistake. You’ll need to work with a licensed grease rendering or collection service. They provide the right receptacle and will schedule regular pickups for recycling, usually to be turned into biofuel. It’s also smart to keep records of your oil disposal; health inspectors in places like Seattle and Tacoma are known to ask for them.
Mixing and Applying the Boil-Out Solution
With the fry pot empty, it's time to break out the serious stuff: the boil-out solution. You absolutely must use a commercial-grade, food-safe fryer cleaner. Regular soaps or degreasers from the hardware store are not designed for this and can leave behind nasty chemical residues.
Fill the fry pot with water, stopping just below the oil-fill line. Then add the boil-out cleaner, following the manufacturer's directions on the bottle to get the ratio right. Too little, and you're wasting your time; too much, and you'll be rinsing for an eternity.
Here's a pro tip I've seen in countless kitchens: add the cleaner after you've added the water. If you dump the powder or liquid in an empty pot and then hit it with water, it can foam up like a science experiment and spill everywhere.
Now, turn the fryer on and bring the solution to a slow, gentle boil. You want a simmer, not a raging overflow. Let it bubble away for about 20-30 minutes. This gives the chemicals enough time to break down all that polymerized grease and stubborn carbon clinging to the walls and heating elements.
The Art of Scrubbing and Rinsing
After the solution has worked its magic, kill the heat and let the water cool down enough so you don't get burned. Drain the dirty water into a separate, designated bucket—never mix it with your used cooking oil.
Time for some elbow grease. Using your long-handled fryer brush and non-abrasive scrubbing pads, get to work on the inside of the fry pot. The boil-out will have loosened most of the grime, but you'll need to put in the effort to get it all. Give extra attention to the corners and the areas around the heating elements. Don't forget to use a clean-out rod to poke through the drain line and make sure it's completely clear.
This next part is where a lot of people cut corners, but it's probably the most critical step of all: rinsing. You have to rinse that fry pot until every last trace of the cleaning solution is gone. Any chemical residue left behind will instantly taint your fresh oil and make your food taste terrible.
- First Rinse: Fill the pot with hot water, give it a good swish, and drain it completely.
- Second Rinse: Do it again. This helps ensure all the soapiness is gone.
- Neutralizing Rinse: On your final rinse, add a little white vinegar to the water. This helps neutralize any lingering alkaline cleaner and gets the surface ready for new oil.
The Final Step: Drying and Re-Seasoning
Water is the enemy of hot oil. After that last rinse, you need to dry the inside of the fry pot completely. Use clean, lint-free towels and get into every nook and cranny. Any moisture left behind will cause violent, dangerous splattering as soon as the new oil heats up.
Once it's bone-dry, close the drain valve tight. Your deep fryer is officially clean and ready for a fresh batch of oil. This detailed weekly process is a cornerstone of a well-run kitchen, reflecting the same high standards you apply to your gleaming Seattle bar equipment and your spotless pizza prep tables.
Your Guide to Deep Cleaning and Maintenance
While weekly boil-outs are a fantastic habit, a periodic deep clean is the full system tune-up that keeps your fryer running efficiently for years. This is your chance to get past the vat and into the components that often get overlooked. Think of it as a proactive check-up for one of your kitchen's most vital pieces of equipment.
This intensive cleaning is also your opportunity to play detective. By getting a good look at the thermostats, connections, and pilot lights, you can catch small issues before they snowball into costly emergency repairs. A perfectly maintained fryer cooks more evenly, which directly translates to less food waste from inconsistent batches.
Disassembly for a Deeper Clean
First things first: always make sure the fryer is completely off, unplugged, and cool. Safety is paramount when you start taking things apart. Carefully remove the fryer baskets and any removable heating elements. These parts are often the biggest culprits for trapping that stubborn, carbonized grease.
Soak these components in a dedicated boil-out solution mixed in a separate, labeled bucket. While they’re soaking, you can turn your attention back to the fry pot itself. The goal is to give every single part a thorough scrubbing, something you just can't do when the elements are in the way.
This level of detail is what separates a good kitchen from a great one. It's the same principle you'd apply when you're how to clean a commercial griddle or getting into every nook and cranny of your prep tables. It's not just about what's visible; it's about total cleanliness.
The Inspection Phase: What to Look For
With the fry pot clear, grab a flashlight and start your inspection. This proactive step is where you can truly protect your investment. A few minutes of careful observation now can save you from a week of downtime later.
Keep an eye out for these potential issues:
- Thermostat and Probes: Check for heavy grease buildup on the thermostat probes. This gunk can insulate them, leading to inaccurate temperature readings and poor oil performance.
- Connections and Hoses: On gas fryers, visually inspect the gas lines for any signs of cracking or wear. For electric models, check the connections for any fraying or damage.
- Pilot Light Assembly: Make sure the pilot light area is completely free of debris. A clogged assembly can make ignition difficult and unreliable.
- Vat Integrity: Examine the interior of the fry pot for any deep scratches, pits, or signs of rust that could compromise its integrity over time.
A well-executed deep clean is more than just a cleaning task; it’s a maintenance routine. Spotting a frayed wire or a failing thermostat early is the difference between a quick, affordable part replacement and a full equipment failure during a Friday night rush.
Reducing Waste Through Better Maintenance
Proper commercial fryer cleaning and maintenance have a direct impact on your bottom line, especially when it comes to food waste. According to a 2023 report, full-service restaurants in the U.S. generate an astonishing 6 million tons of surplus food, valued at $77 billion. A poorly performing fryer with caked-on carbon and degraded oil cooks unevenly, producing substandard food that often gets thrown away—contributing directly to those numbers.
When your fryer holds a consistent temperature, it produces a consistently excellent product. This means fewer discarded batches and more profit from the food you purchase. Proactive maintenance, supported by reliable parts from suppliers like Seattle Restaurant Equipment, is just a smart strategy for any operator.
Answering Your Top Fryer Cleaning Questions
We've covered the daily, weekly, and deep cleaning routines, but let's be honest—in a real kitchen, things are never that simple. Questions always come up when you're in the middle of a busy service. This is where theory meets the reality of a hot, fast-paced kitchen.
Getting straight answers to these common problems is what separates a good kitchen manager from a great one. It helps you build a solid routine, solve issues on the fly, and feel confident you’re making the right calls for your business.
How Often Should I Really Be Changing My Fryer Oil?
There’s no single right answer here. It really comes down to what you’re frying and how much of it. A Seattle seafood joint frying heavily breaded fish and calamari all day will burn through oil way faster than a small cafe that only uses its fryer for a few batches of fries during the lunch rush.
Your first line of defense is your own senses. If the oil looks way too dark, starts smoking long before it hits 350°F, or has that rancid, "off" smell, it’s shot. Dump it. For a more scientific approach, grab some oil testing strips. They give you hard data, helping you find that sweet spot between getting the most life out of your oil and serving consistently great food.
- Heavy Use: If you’re frying breaded items or high-moisture foods, you should be filtering daily and swapping the oil every 3-5 days.
- Light Use: For kitchens mostly frying potatoes or other low-sediment items, filtering every other day with a full oil change once a week usually works well.
What Are the Telltale Signs I Need a New Fryer?
Even a workhorse fryer that's been perfectly maintained will eventually give out. You need to watch for performance issues that no amount of cleaning can fix. If your fryer takes forever to get back to temperature after you drop a basket of frozen fries, or if it struggles to hold a steady temp, that’s a major red flag.
Obvious physical damage is another sign. Deep cracks, pitting, or rust inside the fry pot aren't just ugly—they're safety hazards that can harbor bacteria. But the biggest telltale sign? Your repair bills. If you’re on a first-name basis with your repair tech, the money you're pouring into that old unit could be better spent on a new, more efficient model.
An old, inefficient fryer is a constant drain on your business. It guzzles energy, creates safety risks, and makes your food taste worse. An upgrade isn't just a purchase; it's a smart investment.
Upgrading to a new deep fryer from a trusted supplier almost always pays off. Modern fryers have better energy efficiency and much tighter temperature controls, which means lower utility bills and better-tasting food.
Can I Just Use Dish Soap for a Boil-Out?
Absolutely not. This is a hard "no." You must use a dedicated, food-safe commercial fryer cleaner for a boil-out. Those special formulas are engineered to break down the polymerized grease and carbon buildup that regular dish soap can't even touch.
Using something like Dawn is not only useless, but it's also dangerous. It can leave behind a chemical residue that will contaminate your fresh oil, make your food taste soapy, and could even make your customers sick. Always use the right chemical for the job.
How Do I Legally Dispose of Old Cooking Oil in Washington?
Pouring used cooking oil down any drain—whether it’s a floor drain or a sink—is illegal in Washington State. It will cause catastrophic plumbing blockages for you and the city, and you’ll be hit with some seriously hefty fines. You are legally required to work with a licensed grease collection or rendering service.
These companies provide your restaurant with a special bin for used oil and will come by on a regular schedule to pick it up. That old oil gets recycled into things like biofuel or animal feed. It is critical that you keep records of your oil disposal. Health departments in cities like Seattle, Spokane, and Tacoma will often ask for this documentation to prove you’re following local environmental codes. It’s just a basic part of running a responsible kitchen.
Equipping your kitchen with reliable, high-performance equipment is the first step toward operational excellence. At Seattle Restaurant Equipment, we provide the durable commercial refrigerators, under counter freezers, prep tables, and deep fryers that Washington's top foodservice businesses rely on. Discover our full range of products and find the perfect solutions for your kitchen by visiting https://seattlerestaurantequipment.com.