

Knowing the right way to clean a commercial deep fryer isn't just about ticking a box on a checklist. It's a routine that directly impacts your food's taste, makes your cooking oil last longer, and helps you dodge those seriously expensive repair calls. This isn't just a cleaning task; for any smart foodservice operator, it's a core part of the business plan.
Why a Pristine Fryer Is Your Kitchen's Secret Weapon
Let's be real—cleaning the deep fryer is a job nobody in the kitchen gets excited about. But for savvy restaurant owners in places like Seattle or Tacoma, a spotless fryer isn't a chore, it's a critical piece of strategy. A consistent cleaning routine directly boosts your bottom line. How? By making your food taste better, slashing oil costs, and seriously extending the life of your equipment. This is about preventing those late-night emergency repair calls and making sure every single batch of fries comes out perfectly golden.

The right process can turn this headache of a task into a powerful tool for running a tight ship. On the flip side, ignoring it has immediate, expensive consequences that you'll feel across the entire kitchen.
The True Cost of a Dirty Fryer
A neglected fryer is an inefficient one, plain and simple. When old food bits and oil particles break down, they create a stubborn layer of carbonized gunk that clings to the fry pot and heating elements. This buildup acts like an insulator, forcing your fryer to work way harder and burn more energy just to get up to temp.
The impact on your business hits you from three different angles:
- Higher Utility Bills: You'll see your energy consumption creep up as the fryer struggles to maintain heat.
- Slower Recovery Times: The oil takes longer to rebound between batches, which means slower ticket times during a Friday night rush.
- Increased Equipment Strain: Making the fryer constantly overwork itself leads to parts failing way too soon and more calls to the repair tech.
A poorly maintained fryer doesn't just cost you money in repairs; it silently sabotages your food quality. The taste of old, burnt-on carbon will transfer to fresh food, resulting in off-flavors that customers will absolutely notice.
Extending Equipment Lifespan and Food Quality
Get this: regular monthly boil-outs can extend your fryer's lifespan by up to 40%. That saves you from shelling out $2,500-$5,000 for a new standard 40-lb gas fryer. We've seen a single neglected fryer in a multi-unit operation show a 15% drop in frying efficiency after just three months of spotty cleaning, all because carbon buildup was blocking 20-30% of the heating elements. For a closer look at fryer efficiency, check out the info over on FryOilSaver.com.
Investing time in a proper cleaning schedule is one of the smartest financial moves a kitchen manager can make. It protects your investment in quality commercial fryers and guarantees your customers get the consistently delicious food they came for. The only alternative is a frustrating cycle of poor performance, frequent repairs, and eventually, a full replacement.
Putting Together Your Fryer Cleaning and Safety Kit
Before you even think about draining a single drop of oil, you need to get your gear in order. A safe and effective fryer cleaning session starts with having the right tools on hand. This isn't just about making the job easier—it's about keeping your staff safe and protecting a very expensive piece of kitchen equipment. Trust me, trying to tackle hot oil and commercial-grade chemicals without the proper setup is just asking for trouble.
Safety has to be the top priority. Before anyone lays a hand on that fryer, they need the right Personal Protective Equipment (PPE). This part is absolutely non-negotiable.
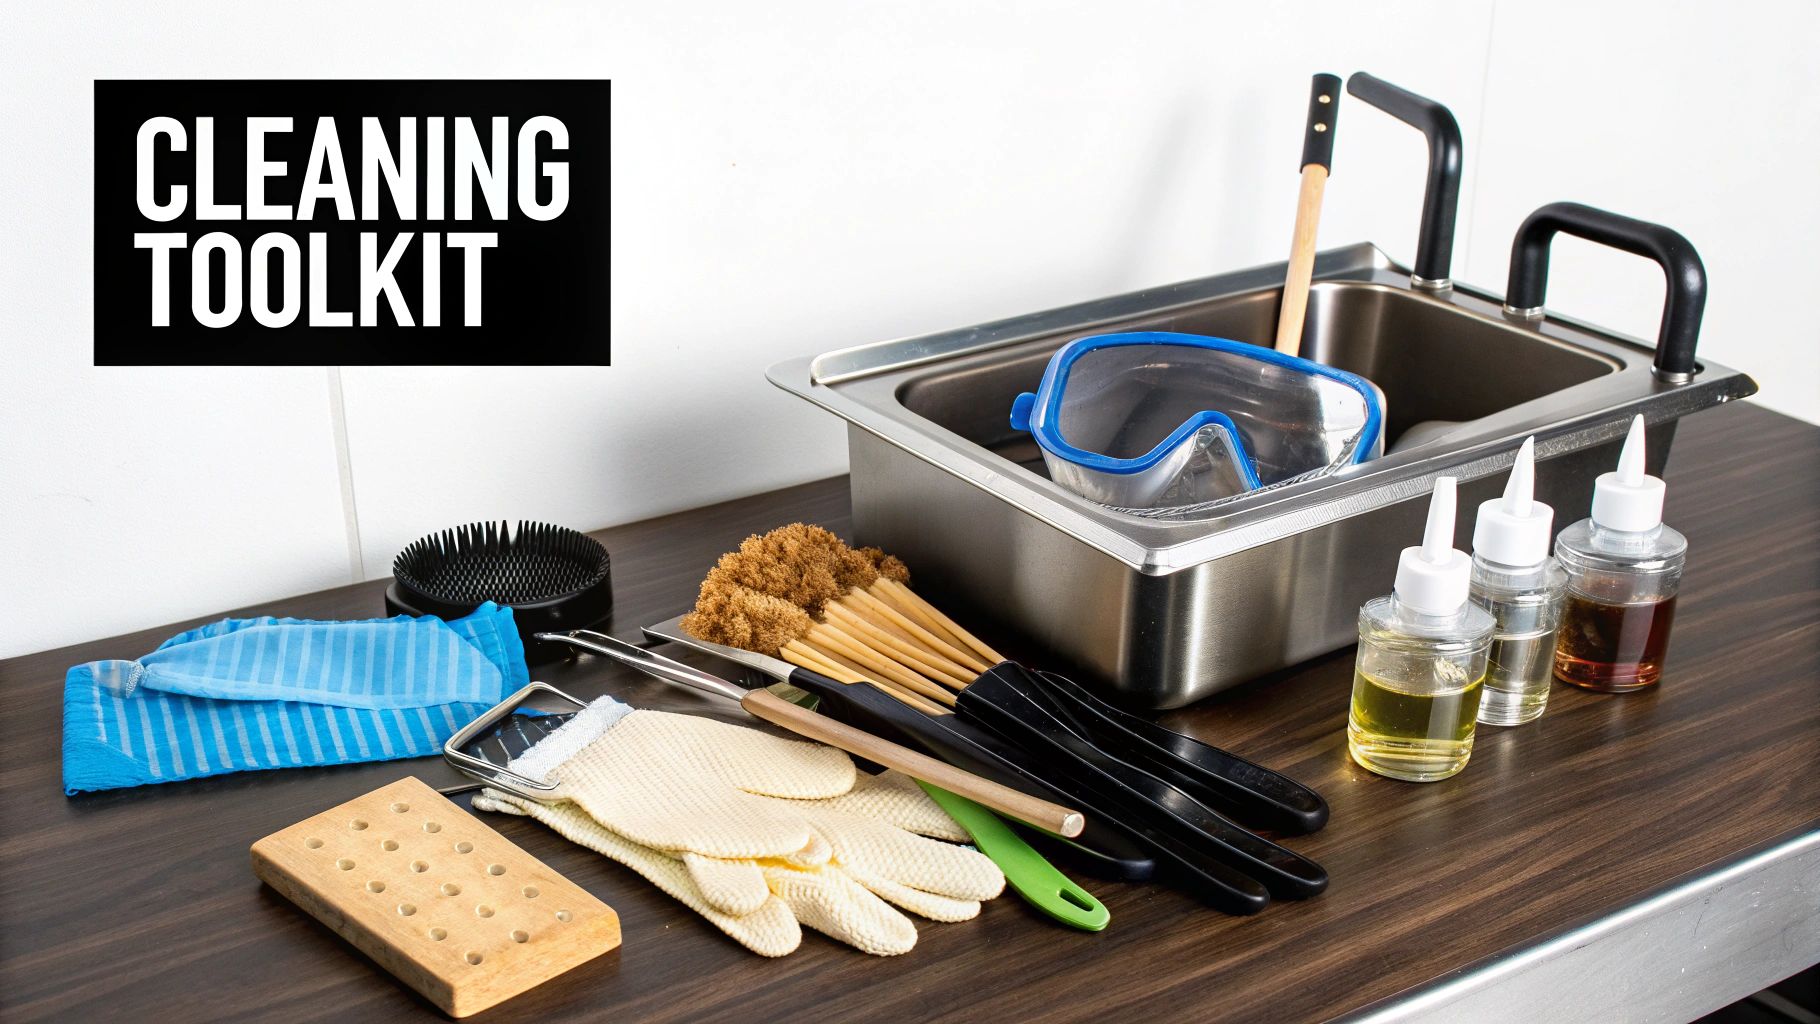
Must-Have Personal Protective Equipment
When you're dealing with residual heat and powerful cleaning agents, the standard kitchen apron and gloves just won't do. Your safety kit needs to be stocked with the real deal.
- Heat-Resistant, Heavy-Duty Gloves: We're talking about long gloves that go up the forearm. They're your best defense against splashes from hot oil or the boil-out solution.
- Splash-Proof Goggles or a Face Shield: You only get one set of eyes. Protecting them from chemical splashes is critical, and a regular pair of glasses offers zero real protection.
- Water-Resistant Apron: This gives you an essential extra layer of defense against spills and splashes, keeping those harsh chemicals away from your clothes and skin.
Think of PPE as your first line of defense. Spending a little extra on high-quality safety gear is a whole lot cheaper than dealing with a workplace injury. One bad accident can sideline a key employee and throw your whole operation into chaos.
The Right Tools for the Job
Once everyone is properly geared up, it's time to talk tools. You need specialized equipment designed specifically for cleaning a commercial deep fryer. Grabbing whatever is lying around can easily damage the fryer and won't get the job done right.
Your cleaning arsenal should always include:
- Long-Handled Brushes: You'll need brushes with stiff bristles to really scrub the walls of the fry pot and get around the heating elements without having to stick your hands in there.
- Specialized Scrapers: Look for non-abrasive scrapers. They're designed to get that stubborn, baked-on carbon off without gouging or scratching the stainless steel.
- Fryer Clean-Out Rod: It's a simple tool, but it's worth its weight in gold. This rod is perfect for clearing out any solidified gunk or food bits from the drain line, ensuring everything flows out smoothly.
- Dedicated Boil-Out Cleaner: Stay away from all-purpose cleaners or basic dish soap. You need a commercial-grade, non-foaming boil-out powder. It’s specifically formulated to break down that tough, polymerized grease safely and effectively.
Making sure you have these specific items ready to go will make the entire process safer and far more effective. It's the best way to protect the investment you've made in one of your kitchen's most important workhorses.
Building Your Daily and Weekly Cleaning Routines
The real secret to keeping a commercial fryer from becoming a nightmare to clean isn't some magic spray. It's just consistency. When you get your kitchen crew into a few simple, repeatable habits, fryer maintenance stops being a dreaded deep-clean and becomes a series of small, manageable tasks. It's honestly the best way to protect your equipment, keep your food tasting great, and get a handle on operating costs.
A few minutes of work at the end of every single shift will save you hours of brutal scrubbing down the road. It’s all about creating a workflow that becomes automatic, whether you're running a high-volume spot in downtown Seattle or a food truck in Bellevue. This isn't just about being clean; it's about being smart.
The Power of Daily Habits
Your end-of-shift routine needs to be quick, efficient, and absolutely non-negotiable. This is where you knock out the small stuff that makes the biggest impact, mostly focusing on the oil itself and the surfaces you can see.
The number one most critical daily task is filtering the oil. After a full service, that oil is full of tiny food particles and sediment. If you let that sit overnight, it just burns, breaking down the oil and making tomorrow's food taste bitter and off. Filtering pulls all that junk out, which means your oil stays fresher, longer.
Once the filtering is done, the rest is simple:
- Wipe Down the Exterior: Grab a clean, damp cloth and a good degreaser. Give all the stainless steel surfaces, knobs, and handles a quick wipe. This is what stops that sticky, greasy film from ever building up in the first place.
- Clean the Fry Baskets: Scrub those baskets with hot, soapy water and a stiff brush. Get all the hardened bits of batter and food off, then let them air dry completely.
- Inspect the Area: Take a quick look at the floor and walls around the fryer and wipe up any grease splatter.
A solid daily routine is more than just about looking good—it's powerful preventative maintenance. In fact, consistent daily care prevents 70% of common fryer failures, like the clogged drain lines that hit one in four fryers every year.
In a competitive market like the U.S. Pacific Northwest, where fried appetizers can make up 35% of a casual dining spot's revenue, skipping these simple steps can easily lead to $1,200 average repair bills. Filtering your oil every day can also stretch its life by an extra three to five uses, saving you $15-$20 each time you would have changed it. You can see more about how these savings add up and why routine care is so vital over at Smart Care Solutions.
Your Essential Weekly Check-Up
While the daily wipe-downs handle the surface grease, your weekly check-up goes a little deeper. This is your chance to really get inside the fry pot and look at key parts before they turn into bigger problems. Even just a thorough weekly wipe-down of a cooled, empty fryer pot can dramatically reduce how much carbon builds up between your full boil-outs.
During this weekly once-over, really focus on the heating elements or tubes. Gently wipe them down to get any soft carbon gunk off. Doing this helps maintain efficient heat transfer, so your fryer heats up fast and recovers its temperature quickly during a rush. This is a fundamental step in learning how to clean a commercial deep fryer for the long haul. It's a tiny investment of time that pays off big with better performance and fewer expensive repair calls, which helps your whole kitchen run that much smoother.
To make things crystal clear for your team, it helps to have a checklist that breaks down what needs to happen and when. Here’s a simple comparison to get you started.
Daily vs Weekly Fryer Cleaning Checklist
This table lays out the essential tasks, showing your crew what's expected at the end of a shift versus what can be tackled once a week.
| Task | Frequency | Average Time | Key Benefit |
|---|---|---|---|
| Filter Cooking Oil | Daily | 10-15 min | Extends oil life, improves food flavor |
| Wipe Down Exterior | Daily | 5 min | Prevents greasy buildup, professional look |
| Scrub Fry Baskets | Daily | 5-10 min | Removes food particles, ensures sanitation |
| Clean Surroundings | Daily | 2-3 min | Reduces slip hazards, maintains kitchen hygiene |
| Wipe Fry Pot Interior | Weekly | 10-15 min | Slows carbon buildup between boil-outs |
| Inspect Heating Elements | Weekly | 5 min | Ensures efficient heating and prevents damage |
| Check for Oil Leaks | Weekly | 2 min | Catches small issues before they become major repairs |
| Verify Thermostat Accuracy | Weekly | 5 min | Guarantees correct cooking temps, ensures food safety |
Having this visual guide posted near the fryer station removes any guesswork. It turns a chore into a system, and a system is what keeps your kitchen running like a well-oiled machine—pun intended.
Executing the Perfect Monthly Boil-Out
Your daily and weekly cleaning routines are the first line of defense, but the monthly boil-out is the main event. This is the deep clean that truly resets your fryer, getting rid of the stubborn, polymerized grease and carbon that simple wipe-downs just can't handle.
Frankly, knowing how to do a proper boil-out is what separates a well-maintained fryer from a costly breakdown waiting to happen. It transforms your greasy workhorse back into the pristine, high-performance machine it was meant to be. Let’s walk through it, from draining the old oil to seasoning the fryer for the month ahead.
Draining and Prepping for the Boil-Out
First thing's first: safety. Turn the fryer completely off and let that oil cool down. You want it below 150°F before you even think about draining it. Trying to handle scalding hot oil is one of the most dangerous jobs in any kitchen, so patience isn't just a virtue here—it's a requirement.
Once it's cool enough, carefully drain the oil into a designated, heat-resistant container. As it's draining, grab a non-abrasive scraper and gently knock off any big, loose carbon deposits from the inside of the fry pot. Getting this stuff out now means the boil-out solution has less work to do later.
Mixing and Managing the Boil
With the fryer empty, make sure that drain valve is shut tight. Now, fill the pot with water, stopping just below the oil level line. Add your commercial-grade boil-out cleaner, following the manufacturer's directions to the letter. Using too much can damage the equipment, and using too little won't get the job done.
Turn the fryer back on and bring the solution to a slow, gentle boil. We're not looking for a raging, aggressive boil—a steady simmer is exactly what you want. Let it do its thing for about 20-30 minutes. This is where the magic happens; the hot, chemical solution starts dissolving and lifting all that tough, baked-on gunk.
Pro Tip: Never, ever walk away from a boiling fryer. The process can create a lot of foam, and you need to be right there to turn down the heat if it looks like it's going to boil over. A few seconds of inattention can lead to a dangerous mess.
This infographic breaks down the core actions of good fryer maintenance, from the daily filter to the deep scrub of a boil-out.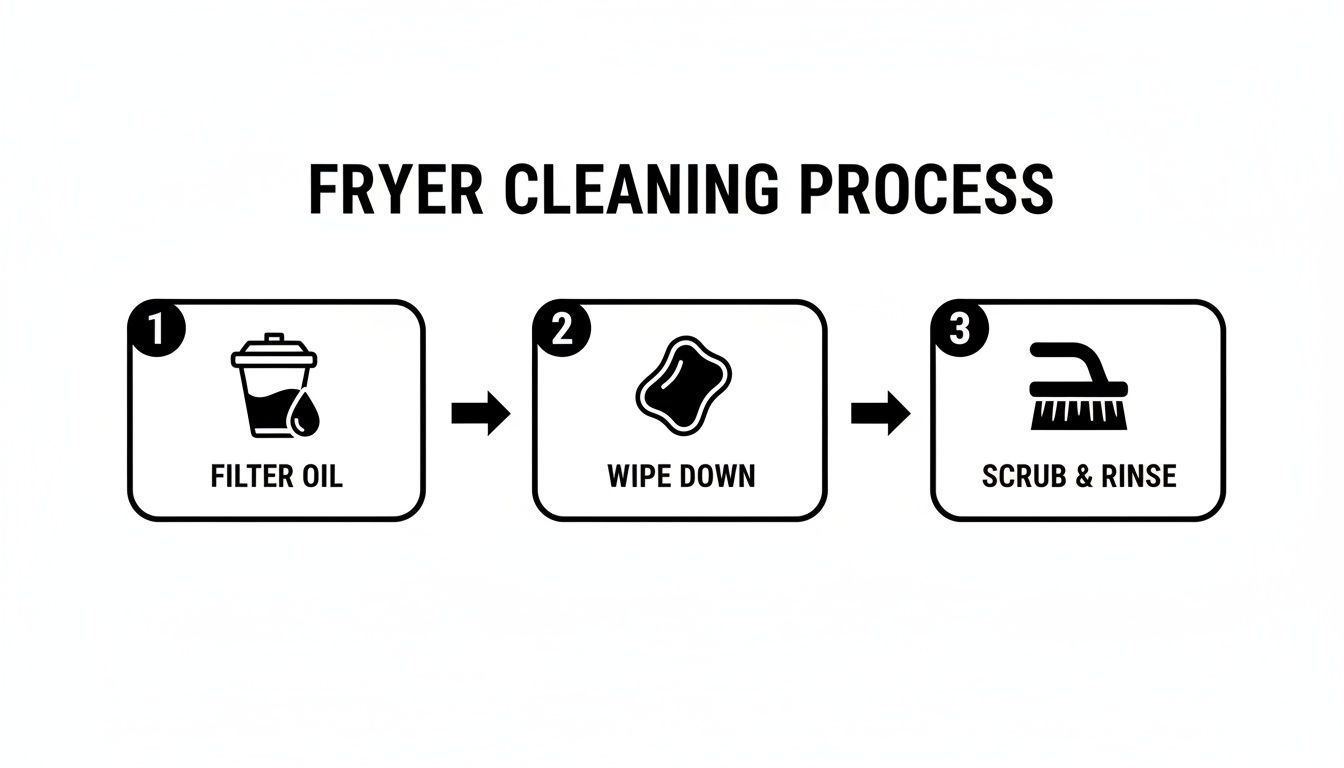
Each part of the process—filtering, wiping, and scrubbing—plays a critical role in preventing buildup and keeping your fryer running longer.
The Scrub, Rinse, and Neutralize Phase
After about a half-hour of simmering, turn off the fryer and let the solution cool down so it's safe to handle. Drain the dirty water completely. Remember, managing greasy wastewater is a big part of kitchen compliance. If you're not up to speed on the regulations, learning about grease trap sizing and maintenance is a crucial next step.
Now it’s time for some elbow grease. While the fry pot is still warm, take a long-handled, stiff-bristled brush and scrub every single inch of the interior. Really get into the corners, around the welds, and near the heating elements—that’s where carbon loves to hide.
Once you've scrubbed it clean, it's time to rinse. And rinse again.
- First Rinse: Fill the fryer with clean, hot water and use the brush to wash away all the loose grime and leftover cleaner. Drain it all out.
- Neutralizing Rinse: This is a step you can't skip. Fill the pot again, but this time, pour in about a cup of white vinegar. The vinegar neutralizes any alkaline residue from the cleaning chemicals, which would otherwise contaminate your fresh oil. Swish it around, let it sit for a few minutes, then drain it.
- Final Rinse: One last rinse with clean water makes sure every trace of vinegar is gone.
Finally, take some clean, lint-free towels and dry the inside of the fryer completely. Any moisture left behind will cause a violent, dangerous splatter when you add new oil.
Seasoning for Future Success
The final touch is seasoning the clean pot. Pour just enough fresh cooking oil into the dry fryer to coat the bottom. Turn the fryer on to a low heat—around 300°F—and let it warm up for 10-15 minutes.
This quick step creates a thin, non-stick layer on the metal. It helps prevent rust and makes your next cleaning session that much easier. After seasoning, turn off the heat, let it cool a bit, and carefully wipe out any excess oil.
Your fryer is now officially reset, sanitized, and ready for another month of cranking out perfectly fried food.
Troubleshooting Common Fryer Problems
Even when you follow a perfect cleaning schedule, commercial kitchen equipment is going to have bad days. When your fryer starts acting up, it sends ripples through the whole kitchen, slowing down ticket times and leaving your cooks scrambling.
Knowing what to look for can help you nip minor issues in the bud before they turn into a full-blown emergency requiring a costly service call. Most fryer headaches can be traced back to a handful of culprits: inconsistent cleaning, worn-out parts, or just plain old improper use. Let's walk through what to look for when things go wrong.
Slow Heating or Temperature Recovery
One of the most common complaints I hear is a fryer that takes forever to get hot or can't recover its temperature between baskets of frozen fries. When this happens, you’re almost always dealing with poor heat transfer caused by a nasty layer of carbon buildup on the heating elements.
That caked-on gunk acts like an insulator, making the fryer work overtime just to heat the oil. Your first move should always be a thorough boil-out. If that doesn't fix it, you might be looking at a more technical problem:
- Bad Thermostat: The thermostat could be giving a false reading, telling the fryer it's hot when it's not.
- Failing High-Limit Switch: This is a safety feature, but if it's faulty, it can trip for no reason and kill the heat.
- Gas Pressure Issues: For gas models, low or inconsistent pressure from the main line means a weaker flame and sluggish heating.
Smoking Oil and Off Flavors
See smoke coming off the oil before it even hits your target temperature? That's a huge red flag. It means your oil is breaking down way too early, usually because it’s contaminated with old, carbonized food bits that have sunk to the bottom. This junk drastically lowers the oil's smoke point.
Smoking oil is more than an annoyance—it's a direct threat to your food quality. That oil is giving everything you cook a burnt, nasty flavor, and trust me, your customers will notice.
This problem almost always comes down to poor filtering. Your crew needs to be filtering the oil at the end of every single shift, no exceptions. If it’s still smoking after that, it’s time to dump the oil and do a deep boil-out to give the fry pot a fresh start.
Poor ventilation can also make things worse. If your exhaust system is struggling to keep up, you can find some helpful info in our guide to installing a commercial ventless hood.
Pilot Light Problems
On a gas fryer, a pilot light that refuses to stay lit will shut down your entire operation. The usual suspect here is a dirty pilot orifice clogged with grease and dust.
Another common culprit is the thermopile or thermocouple. This is the little sensor that sits in the flame and tells the gas valve to stay open. If it gets covered in gunk or starts to fail, it won't sense the heat, and the gas will shut off. Sometimes, a gentle cleaning with a soft brush is all it takes to bring it back to life.
Got Fryer Questions? We've Got Answers.
We hear these questions all the time from folks running kitchens just like yours. Here are some quick, no-nonsense answers to the most common queries about keeping your fryer in top shape. Getting this right is just as important as maintaining your commercial refrigerators or any other workhorse in your kitchen.
How Often Should I Really Change My Fryer Oil?
Honestly, it all comes down to what you're frying and how much of it.
If you're a high-volume spot cranking out heavily breaded items all day, you might be looking at a change every two or three days. On the other hand, a small café that only uses its fryer for a few specific dishes could easily go a full week.
Forget the calendar and learn to read the oil itself. Is it getting dark? Is it smoking more than usual, foaming up, or giving off a funky smell? Those are your signs. It’s time for a change.
The single best thing you can do to make your oil last longer is to filter it every single day. This one small habit can often double its lifespan, which is a huge win for your food quality and your wallet.
What's the Right Way to Get Rid of Used Cooking Oil?
Whatever you do, never pour old cooking oil down the drain. It's not just a bad idea; it’s illegal here in Washington and a surefire way to cause a plumbing catastrophe that could shut your whole operation down.
State law is clear: you have to use a licensed grease collection service. These companies are pros—they’ll set you up with a proper storage bin and haul it away on a regular schedule, making sure it gets recycled correctly. This isn't optional; it's a fundamental part of running a professional kitchen.
You wouldn't dump grease down the drain by your sandwich prep tables, and the fryer is no different.
Can I Just Use Dish Soap for a Boil-Out?
Please don't. That's a hard no.
Your standard dish soap simply isn't built to tackle the kind of baked-on, polymerized grease that builds up in a commercial fryer. Worse yet, it can leave behind a soapy film that’s not safe for food and can even corrode the fryer's metal over time.
You need a real, commercial-grade boil-out cleaner. Always stick to products specifically designed for the job.
What Does "Seasoning a Fryer" Actually Mean?
Seasoning is the final, crucial step after you've done a full boil-out. Think of it like seasoning a cast-iron skillet.
Once the fry pot is perfectly clean and dry, you'll apply a very thin layer of fresh oil to the inside and heat it up. This creates a protective, non-stick surface.
This simple step helps prevent rust and makes every future cleaning session that much easier. Skipping it means food is more likely to stick, and you'll ultimately shorten the lifespan of your fry pot—a key piece of equipment right up there with your commercial freezers and pizza prep tables.
Whether you're outfitting a new bistro with Seattle bar equipment, upgrading your Seattle coffee shop refrigerators, or just looking to improve your current kitchen, having the right gear is only the first step. From under counter refrigerators and under counter freezers to the best deep fryers, proper maintenance is what makes that investment pay off. Check out our full lineup of dependable equipment at https://seattlerestaurantequipment.com.