

Ever found yourself staring at a tray of perfectly prepped pastries, only to pull out a batch that’s half-burnt and half-raw? It's a maddeningly common problem in commercial kitchens across Seattle. You set the dial to 350°F, but what you get is a costly game of culinary roulette.
The simple truth is, the temperature you set on your oven dial is almost never the actual, stable temperature inside.
Why Your Oven Dial Is Often Wrong
This gap between what you set and what you get is where inconsistency is born. It’s not just one thing. It could be a faulty thermostat, hidden hot and cold spots that sabotage your cooking, or wild temperature swings as the heating element cycles on and off.
This isn't a minor inconvenience. For a busy restaurant, it means wasted food, unpredictable quality, and unhappy customers. It’s an issue that hits every piece of equipment, from the big, high-capacity convection oven on the main line to the small oven in a pizza prep table.
The Real Cost of Inaccurate Temperatures
Think about it: an oven running just 20 degrees too hot can scorch delicate baked goods. Twenty degrees too cold can leave proteins undercooked or stretch out cooking times, throwing your entire kitchen’s rhythm off track. This guide will walk you through a no-nonsense, professional way to figure out what your oven is really doing. Getting this right is fundamental to the consistency that keeps people coming back.
You'd be shocked at how much temperatures can drift. Real-world tests on commercial ovens consistently show how rarely they hold a set temperature. One study revealed a significant 20°F mean kinetic temperature variance, with ovens overshooting or undershooting their targets by as much as 15-25°F during a normal cycle.
The pros at America’s Test Kitchen don't mince words: "Ovens are inaccurate. Since all ovens cycle on and off to maintain temperature, even the best models will periodically deviate from the desired target... we’ve found that ovens set to the same temperature can vary by as much as 90 degrees."
Accepting this reality is the first step to taking back control. Whether you're working with a standard oven or a fan-assisted model, knowing its true performance is non-negotiable. Check out our guide on convection vs regular ovens to see how different heating styles play into this. From the ingredients in your commercial refrigerators to the final product, accurate temperature control is everything.
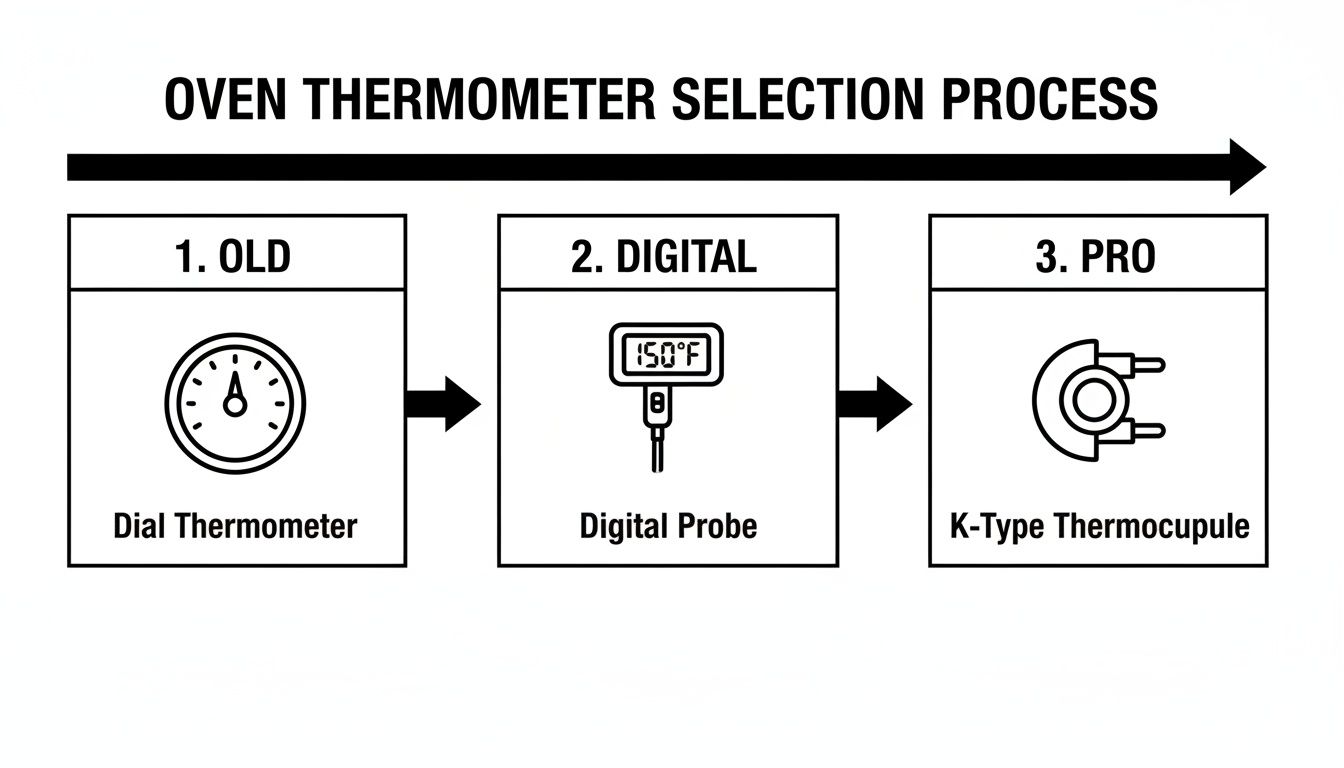
Choosing the Right Tools for an Accurate Oven Test
Getting a real temperature reading starts with the right gear. First thing's first: toss that cheap dial thermometer that came with your oven. Seriously. That little thing is probably costing you money in burned bread and undercooked roasts. It can easily be off by 25-50°F, a massive gap that turns professional cooking into a guessing game.
To get any real accuracy, you need to upgrade your tools. Investing in a quality digital thermometer is just as important as the commercial ovens and ranges themselves. It’s a small price to pay for consistency and quality control you can count on.
Why Digital Probes Are the Kitchen Standard
In any serious commercial kitchen, a multi-probe digital thermometer with a Type K thermocouple is the gold standard. These aren't your average home-use gadgets; they give you instant, hyper-accurate readings that are essential for figuring out what's really going on inside your equipment.
Unlike a slow-to-react analog dial, a digital probe can actually track the rapid temperature swings—the peaks and valleys—as your oven’s heating elements cycle on and off. That’s the kind of detail you need. It shows you the full performance range, not just a vague average, so you can tell if the temperature swings are too wide for stable cooking.
This tool is a true kitchen workhorse. The same probe you use to test a convection oven can also verify the oil temp in your deep fryers or check the holding temperatures of your sandwich prep tables and under counter refrigerators. It’s one tool to ensure food safety and quality across your entire line.
If you take one thing away from this, it's this: ditch the dial. The experts at America's Test Kitchen found that ovens set to the same temperature can vary by as much as 90 degrees. A quality digital thermometer is the only way to know what's truly happening inside your equipment.
Picking the Right Thermometer for the Job
Not all digital thermometers are the same. Picking the right one for your kitchen is key to getting reliable data from your equipment. While any decent digital probe is a huge leap from an analog dial, there are a few options to consider based on what you’ll be testing.
To help you decide, here’s a quick rundown of the common types you’ll find.
Choosing the Right Thermometer for Your Kitchen
| Thermometer Type | Best For | Typical Accuracy | Pros | Cons |
|---|---|---|---|---|
| Digital Probe w/ Grate Clip | Precisely testing oven cavity air temperature. | ± 1-2°F | Hands-free operation; measures ambient air, not just surface temp. | Not as versatile for spot-checking food temps. |
| Multi-Probe K-Type | All-around diagnostics for ovens, fryers, grills, and refrigerators. | ± 0.5-1°F | Extremely accurate; versatile with interchangeable probes. | Higher initial cost; can be more complex. |
| Infrared (IR) Gun | Quick surface temperature checks on griddles or pans. | ± 3-4°F | Instant, no-contact readings. | Only measures surface temp, not internal or air temp. |
| Digital Instant-Read | Spot-checking internal food temperatures. | ± 2-3°F | Fast and easy to use; portable. | Not designed for monitoring oven cycles over time. |
A model with an air probe and a grate clip is purpose-built for oven testing. This setup lets you hang the sensor right in the middle of the oven cavity, giving you the most accurate baseline reading possible, away from hot or cold spots.
Think about the needs of your entire kitchen. A single, versatile thermometer that can handle the high heat of ovens, the cold of commercial freezers and under counter freezers, and quick checks on pizza prep tables offers the best bang for your buck. Whether you're outfitting a new Seattle coffee shop or just trying to keep an established restaurant running smoothly, the right diagnostic tools are foundational. A reliable thermometer ensures every piece of equipment, from your Seattle bar equipment to your Seattle coffee shop refrigerators, is pulling its weight.
Mapping Your Oven's Hot and Cold Spots
Alright, you've got your thermometer. Now it's time to figure out what's really going on inside that oven. We're going to move beyond just sticking a probe in the middle and calling it a day. The goal is to create a detailed map of your oven's thermal landscape—all its quirks, hot spots, and cold corners. This is how you finally put an end to unevenly cooked food.
First things first, we need a baseline. This means running a "no-load" test on a completely empty oven. It’s a crucial step because it shows you exactly how the oven distributes heat naturally, without any food in the way to absorb or block it. Think of it as getting a clean, unfiltered look at your oven's raw performance.
Setting Up Your Multi-Point Test
To get a truly accurate map, one thermometer in the center just isn't going to cut it. You need to place multiple probes in very specific spots to see the whole picture. This is the only way to know for sure if the back-left corner is scorching hot while the front right, near the door, is struggling to keep up.
For a really thorough test, you'll want to position your probes in these key areas:
- The Absolute Center: This is your control point, the spot where you hope the temperature is perfect.
- Back Left and Right Corners: These spots are often much hotter, sitting closer to heating elements with less airflow.
- Front Left and Right Corners: Temperatures here tend to be lower because of heat loss every time the door opens and from less-than-perfect door seals.
- Top and Bottom Racks: If you're using more than one rack, you absolutely have to test both to understand how heat rises and settles.
This is the exact same approach the pros use to diagnose performance issues in commercial kitchens. Whether it's a massive convection oven or a small countertop unit, understanding these thermal zones is the secret to consistent results.
Running the Test and Logging Data
Once your probes are all set up, crank the oven to a standard commercial cooking temperature, like 350°F (177°C). Now, and this is important, let it preheat for a solid 30 minutes. Ignore that "ready" beep from the oven—it's almost always lying.
After that 30-minute stabilization period, start logging the temperature from each and every probe. Do this every five minutes for a full 30-minute cycle. Your choice of thermometer here makes a big difference, from a simple dial to a professional-grade K-type thermocouple.
The more precise your tool, the more reliable your data will be. Once you've collected your first round of data, do the whole thing over again at a higher temp, say 425°F (218°C). This will show you how the oven behaves under different levels of stress.
I know a Seattle bakery owner who did this and discovered the left side of his big convection oven was running a consistent 20°F hotter than the right. Just knowing that let him immediately adjust his process. He started rotating pans halfway through the bake, and boom—perfectly even results, every single time.
"Even when an oven thermometer set near the center of the oven reaches the set temperature it is essential to continue the preheat for longer to allow the entire oven to achieve a full preheat... a minimum of 30 minutes when set at 350°F."
This is why patience during the preheat is non-negotiable if you want an accurate test. It's not just kitchen wisdom, either. A detailed 2023 study confirmed that even when an oven's average temp is right on the money, there are major variations inside. Areas near the walls were consistently hotter, dropping off toward the door, with a standard deviation of 4.63°C.
This means your oven display can look perfectly stable while hot spots are charring the edges of your food and cold spots are leaving the center raw.
How to Interpret Your Test Results and Calibrate Your Oven
After running your tests, you've got a log full of numbers. This is where the real work begins—turning that raw data into kitchen intelligence you can actually use. First, let's figure out what these readings are telling you and whether your oven needs a little tune-up.Take a look at the average temperature from your center probe. How close is it to what you set on the dial? In most commercial kitchens, a variance of +/- 15°F is perfectly acceptable.
If you set your oven to 350°F and it's consistently averaging 360°F or 340°F, you’re in good shape. But if it’s hitting 375°F, you’ve got a problem that’s burning through profits and ruining food. That needs to be fixed.
Differentiating Normal Cycles from Faulty Thermostats
Now, let's talk about the temperature swings. Every oven has to cycle its heating element on and off to hold a temperature, so you're always going to see some peaks and valleys. That’s completely normal. The important thing is the size of those swings.
A healthy oven trying to maintain 350°F might fluctuate between 330°F and 370°F. But if your logs show wild, unpredictable swings—like plunging to 300°F then spiking to 400°F—that’s a huge red flag. It usually points to a faulty thermostat or a dying heating element.
Consistent, predictable cycles are fine. Erratic, massive swings are not.
A common scenario we see is a Seattle pizzeria discovering their deck oven consistently runs 25°F hotter than the dial indicates. By simply calibrating it, they can immediately prevent burnt crusts and wasted cheese, directly boosting their kitchen's efficiency and profitability.
This isn't just about your main oven, either. The temperature stability of a deep fryer is just as critical, and even the holding units in sandwich prep tables or pizza prep tables need to stay consistent for food safety and quality. A bad thermostat in any of them can be just as costly.
Calibrating Your Oven for Precision
If your tests show a consistent temperature offset—meaning the oven is always hotter or colder by about the same amount—a simple calibration is often all you need. The process is a bit different depending on whether you have an old-school dial or a modern digital display.
For Mechanical (Dial) Thermostats:
- Gently pull the temperature knob straight off its post.
- Look at the back of the knob. You should see a small screw or a plate with calibration marks.
- Slightly loosen the screw and turn the knob or plate to adjust for the difference. If your oven runs 20°F hot, you’ll adjust the dial to read 20 degrees lower.
- Pop the knob back on and run another quick test to make sure you nailed it.
For Digital Thermostats:
- Digital controls have a specific calibration mode you need to enter.
- This usually involves pressing a combination of buttons, like holding "Bake" and "Broil" together for five seconds.
- Once you're in the mode, you can usually nudge the temperature up or down in 5-degree increments.
Before you touch a single dial or button, always consult your owner's manual. Every manufacturer has its own quirks, and following their specific instructions will keep you from creating a bigger problem. A few minutes spent recalibrating can save you hours of frustration and a ton of wasted product down the road.
Advanced Oven Testing and Long-Term Maintenance
For any high-volume restaurant, a quick temperature check is really just scratching the surface. If you want to truly master your kitchen's performance, you have to dig deeper with advanced testing and lock in a solid long-term maintenance plan. This isn't just about busywork; it's a proactive strategy to make sure every piece of equipment, from your main convection oven to the smallest heating elements, is running at peak efficiency.
One of the most powerful advanced techniques is something we call load testing. A standard no-load test shows you what an empty oven can do, but a load test tells you how it actually performs under the stress of a real service. It answers the one question that matters most: how fast does my oven get back to temp after I load it up with cold food?
Picture a chaotic dinner rush. You're pulling one batch of bread out and sliding another one in without missing a beat. Or maybe your pizza oven gets slammed with three cold pies all at once. This is where load testing proves its worth. It reveals the true recovery time, which has a massive impact on your kitchen’s speed and consistency.
Simulating a Real-World Rush
To run a proper load test, you'll want to preheat your oven like you normally would and confirm its baseline temperature is accurate. Then, load it up with something that mimics your actual workflow—a few sheet pans filled with water or even some frozen product will do the trick.
Keep a close eye on how far the temperature drops and, more importantly, how long it takes to recover to your setpoint. A sluggish recovery time can create a serious bottleneck for your entire line.
The data you get from this is gold. It helps you schedule your baking and roasting cycles far more effectively, which is key to preventing undercooked food when you're slammed. It can also shine a spotlight on bigger problems like aging heating elements or failing insulation that a simple empty-oven test would never catch.
Building a Proactive Maintenance Schedule
You can't achieve consistent performance with a one-and-done fix; it's all about routine. The best way to track your oven's health over time is by creating a dedicated maintenance logbook. This simple habit will help you catch small issues before they snowball into expensive, service-killing emergency repairs.
Here’s a good schedule to start with:
- Monthly Quick Checks: Perform a fast, single-probe test right in the center of the oven. You're just making sure it's still holding within its acceptable +/- 15°F range.
- Quarterly Deep Dives: This is when you do a full multi-point test to map out any hot and cold spots. You should also run a load test during this time. Record everything in your logbook so you can easily spot any gradual decline in performance.
This detailed tracking process is often called temperature profiling. It involves dividing the oven into different zones to get a complete picture of its performance. By placing sensors in the center, corners, and on different racks, you get stabilized readings that tell the whole story. As a rule of thumb from a more scientific perspective, a qualified oven running a no-load test at 180°C shouldn't fluctuate more than ±5°C. If you see numbers beyond that, it’s a clear sign a recalibration is needed. You can read more about the scientific approach to oven testing if you want to get really granular.
By proactively monitoring your equipment, you turn maintenance from a reactive expense into a strategic advantage. A well-maintained oven is a reliable oven, minimizing downtime and protecting your bottom line.
This kind of rigorous approach ensures that your investment in top-tier equipment actually pays off. Modern, well-insulated commercial convection ovens, when paired with a strict testing schedule, will keep your kitchen running like a well-oiled machine for years.
Your Top Oven Temperature Questions, Answered
Once you get the hang of testing your oven, you'll still run into questions, especially when things get hectic in the kitchen. We get a lot of calls from restaurant operators around Seattle about their commercial ovens and other heating gear, and a few questions come up all the time.
How Often Should I Test My Oven?
For any kitchen that relies on consistency, make testing a weekly habit. A quick check with a single digital thermometer right in the center of the oven is all it takes. This simple routine helps you spot any temperature drift before it costs you an entire batch of product.
You’ll also want to do a more thorough, multi-point test every quarter. This is where you really map out any hot and cold spots. It's also a good idea to run a full test whenever you notice food cooking unevenly, or right after you install a new piece of equipment like a convection oven or deep fryer. That way, you know its baseline performance from day one.
Is It Normal for My Oven Temperature to Fluctuate?
Yes, a bit of fluctuation is totally normal. Ovens don't just stay at one temperature; their heating elements cycle on and off to maintain the average you set. This naturally creates small peaks and valleys in the actual temperature.
What really matters is how much it fluctuates. A healthy, well-functioning oven will probably swing 20-30°F above and below your set point. But if you're seeing wild, unpredictable swings of 40-50°F or more, that's a red flag. It usually points to a problem with the thermostat, a dying heating element, or even just a bad door seal. That's when it's time to call a pro.
The takeaway? Consistent, predictable temperature cycling is fine. Big, erratic swings mean it's time for a service call before a small problem becomes a big one.
How Is Testing a Convection Oven Different?
The actual steps are pretty much the same, but there’s one huge difference: you have to run the entire test with the convection fan on. That fan is the whole point of a convection oven—it circulates the air to cook everything evenly.
If you run a test and still find major hot or cold spots in a convection oven, something is definitely wrong. It’s a strong sign that the fan motor is failing or something is blocking the airflow. This defeats the whole purpose of the oven. This same logic applies across your kitchen, from your main ovens to the heating elements in your pizza prep tables—everything needs to function as designed.
At Seattle Restaurant Equipment, we know your business runs on reliable equipment. Whether you're in the market for a new convection oven, need to upgrade your under counter refrigerators, or are looking for efficient deep fryers, we have durable, commercial-grade solutions to keep your kitchen humming. Find the perfect equipment for your Washington restaurant at https://seattlerestaurantequipment.com.