

Think of a chafing dish as your buffet's silent hero. It’s not there to cook the food, but to keep it perfectly hot and ready to serve for hours on end. The whole system is surprisingly simple: a pan of hot water sits over a gentle heat source, creating a steam bath for the food pan above. This simple setup is the key to holding food at a safe temperature without ever scorching or drying it out.
Getting this one piece of equipment right is fundamental to pulling off a flawless buffet service.
The Foundations of Flawless Buffet Service
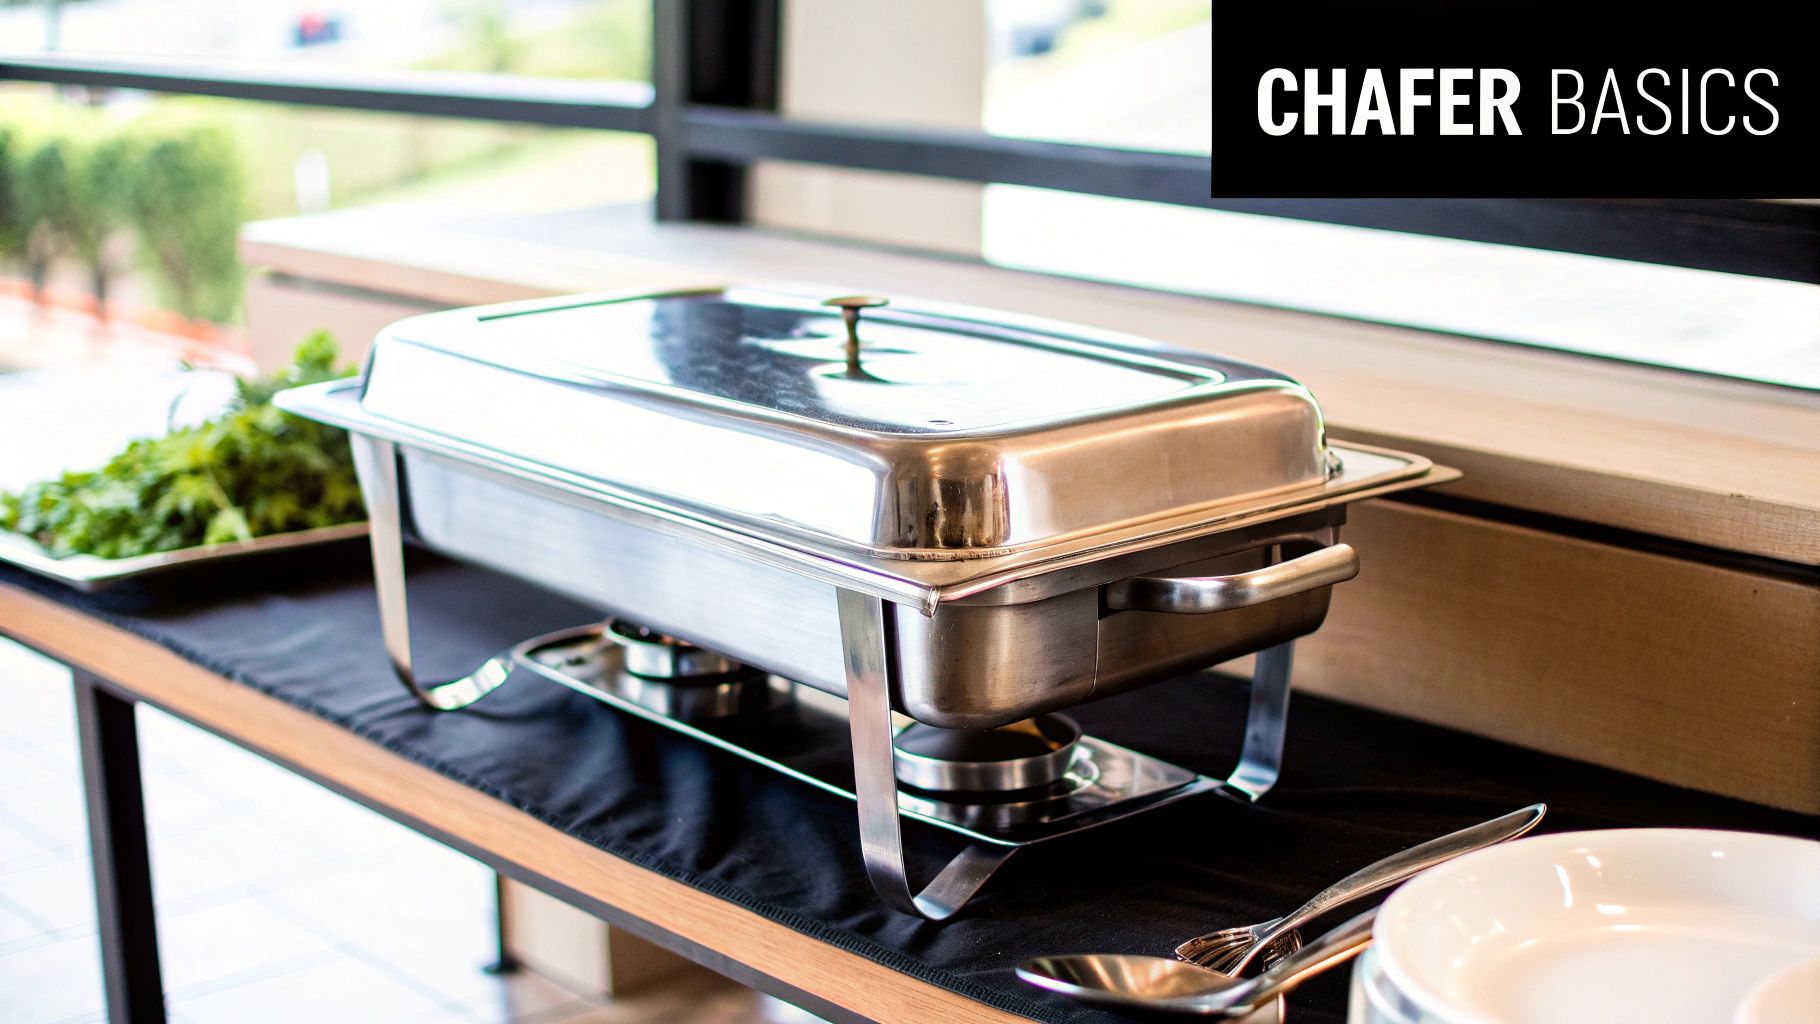
At its heart, a chafing dish—or chafer, as you'll hear in the industry—is a professional holding station. Its entire purpose is to maintain a consistent, safe, and appetizing temperature. This makes it a non-negotiable tool for any operation with a buffet line, from a Seattle coffee shop with a hot breakfast bar to a massive catering event. Essential equipment like Seattle coffee shop refrigerators keep ingredients fresh, but chafers ensure the final product is served perfectly.
The real magic is in the indirect heat. By using a water bath system, technically called a bain-marie, the chafer creates a gentle, humid environment. This is what prevents the dreaded scorching and drying out that happens when you put a food pan directly over a flame. It ensures that the last guest in line gets a serving that's just as moist and delicious as the first.
Understanding the Key Components
Every chafing dish is a sum of its parts, and knowing what each piece does is the first step to using it like a pro. It helps you set things up correctly and quickly figure out what's wrong if something goes sideways during service.
To get a quick overview, here’s a breakdown of the standard parts of a chafing dish and what they do.
| Component | Primary Function |
|---|---|
| The Frame | The sturdy base that elevates the entire setup and safely holds the fuel source. |
| The Water Pan | The deepest pan; it holds the hot water that creates the gentle steam for heating. |
| The Food Pan | The shallower pan that holds your cooked food and nests inside the water pan. |
| The Lid | Traps heat and moisture to keep food warm and prevent it from drying out. |
| The Fuel Holder | A small cup that secures the chafing fuel can and often has a cover to snuff the flame. |
Having a solid grasp of these components makes setup, operation, and troubleshooting a breeze. Each piece is designed to work together to create that perfect holding environment for your food.
Selecting the Right Chafer for Your Service
Choosing the right chafing dish is a lot like picking the right ingredients—the decision you make can have a huge impact on your final presentation and even food safety. The best chafer for your setup really boils down to your service style, your venue, and what you’re putting on the menu.
For mobile caterers or anyone needing flexibility, fuel-powered chafers are the undisputed workhorses of the industry. They're portable, a breeze to set up anywhere, and don't need an electrical outlet. This makes them perfect for outdoor weddings, pop-up events, or any venue where you can't be sure about power access. Their simplicity is their biggest asset.
On the other hand, if you're running a permanent buffet line in a Seattle restaurant, hotel, or corporate cafeteria, electric chafing dishes are the way to go. They deliver incredibly precise, thermostat-controlled heat without the hassle of managing open flames or swapping out fuel cans in the middle of a busy service.
Matching Chafer Shape to Your Menu
The shape of your chafer does more than just hold food; it's a key part of your presentation. A smart selection creates a buffet line that's both functional and visually appealing. Think about how different shapes will fit with your other equipment, like placing a large chafer on a sandwich prep table for easy reloading.
- Rectangular Chafers: These are your go-to for high-volume main courses. Think roasted chicken, big pasta bakes, or steamed vegetables. Their wide surface area makes it easy for guests to serve themselves quickly and efficiently.
- Round or Oval Chafers: These have a more classic, elegant feel. They’re perfect for things like soups, stews, sauces, and side dishes. You'll often see them used as a centerpiece on a buffet, especially near Seattle bar equipment for an appetizer station.
Here's a pro tip: don't just use one type of chafer for your whole buffet. Mixing different shapes adds a lot of visual interest and helps guide your guests through the line, making the whole setup look more dynamic and professional.
Electric vs. Fuel: A Key Operational Choice
The debate between electric and fuel-powered chafers usually comes down to your venue's limitations and how long your service will run. We're seeing electric models become much more popular for fixed locations because they are so reliable and have lower long-term operating costs.
The global market definitely backs this up. The electric chafing dish market was valued at around USD 140 million and is expected to hit USD 200 million by 2032. This growth shows a clear industry shift toward controlled-temperature models, especially in permanent settings where safety and consistency are top priorities.
Whether you're setting up a new kitchen or just upgrading your gear, taking a moment to think through your specific needs is crucial. For a full rundown of what you might need for off-site jobs, take a look at our comprehensive catering equipment checklist. It’s a great resource to make sure you’ve got everything covered, from the right chafers to the essential under counter refrigerators and deep fryers needed for a perfect service.
A Practical Guide to Setup and Fueling
This is where the rubber meets the road. Getting your chafing dishes put together and fueled up the right way isn't just about looks—it's the bedrock of a safe, smooth, and successful buffet service. If you rush it or get it wrong, you could end up with wobbly equipment, food that's barely warm, or even a flame that dies out halfway through dinner.
First thing's first: find a solid, stable spot. Whether you're working with a permanent buffet counter, a spare prep table, or a pop-up serving line, make sure the surface is completely level and doesn't rock. This one simple check can save you from a world of hurt, preventing spills and making sure the chafer frame can handle the weight and the chaos of a busy service.
Assembling for Success
With the frame in place, it’s time for the water pan. A classic rookie mistake is using cold water; this forces your fuel to work twice as hard just to heat the water before it even starts warming your food. Do yourself a favor and always start with hot water—not boiling, but definitely hot to the touch.
Pour in about one inch (2.5 cm) of hot water. That's the magic number. It's enough to create that gentle steam bath you need without making the food pan float around. If your food pan is bobbing like a boat, you've used too much water, and your food won't heat evenly.
Thinking about setup actually starts when you choose your chafer, as this diagram shows.
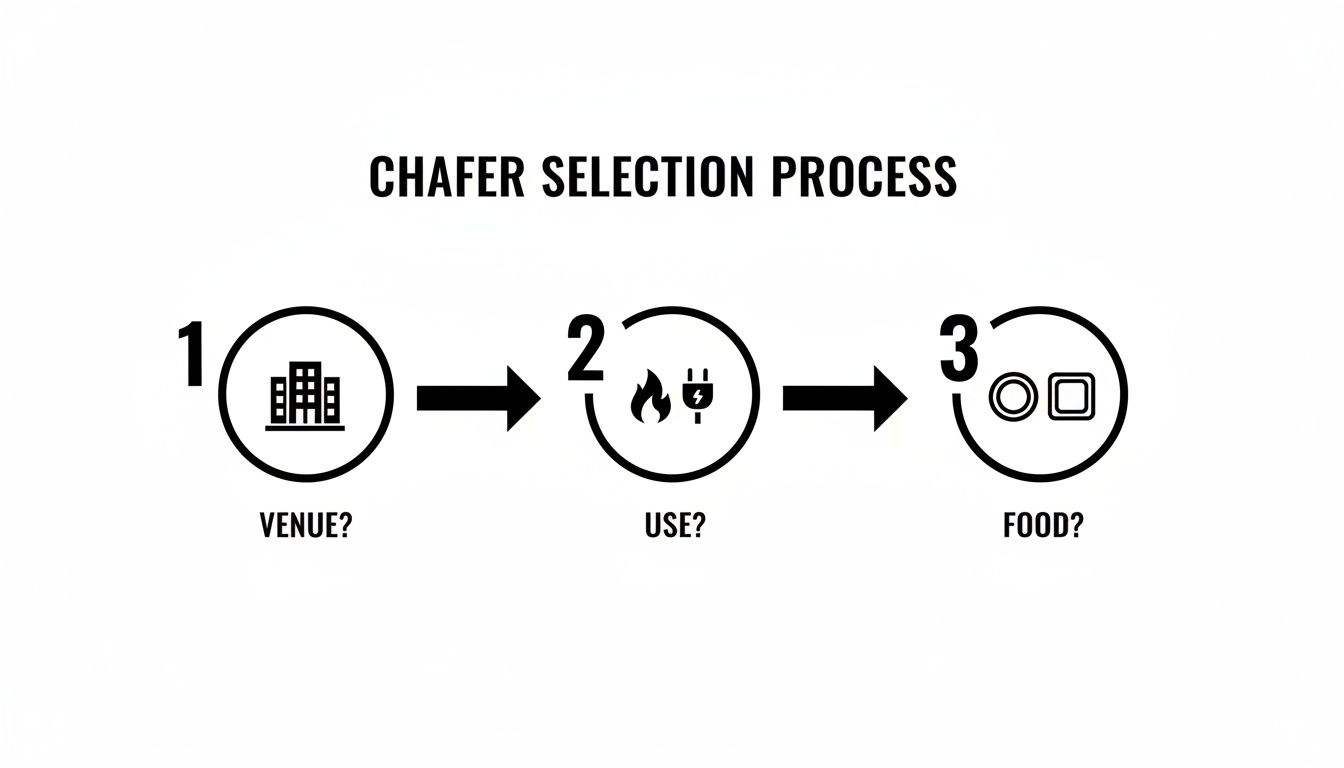
This quick visual guide reminds you that where you're serving, how you're heating, and what you're cooking all play a part in the equipment you'll need to set up.
Choosing and Managing Your Fuel Source
The heat source is the engine of your whole operation, and you've basically got two choices: fuel or electric. This decision will shape the rest of your setup.
- Fuel-Based Chafers: These are the go-to for a reason—they're incredibly portable. You'll be choosing between gel and wick fuel. Gel fuel burns hot with a wide flame, while wick fuel offers a more controlled, steady heat. Just pop the canister into its holder under the water pan. Pro tip: Don't light it until the water is in and the food is ready to go.
- Electric Chafers: These are a dream for permanent setups where you have easy access to outlets, like a hotel breakfast bar or a coffee shop's hot food station. With electric, your main job is managing the cords safely. Make sure they're taped down or run along a wall so nobody trips. Then it's as simple as plugging it in and setting the temperature.
A standard 7-oz (≈200 g) chafing fuel can typically keep food warm for 1.5–2.5 hours, while an electric chafer will run as long as you need it to. It's a classic trade-off between portability and longevity.
Once you see a gentle simmer in the water pan, it’s time to add your food. Carefully place the hot, fully cooked food into the food pan, then set that pan inside the water pan. And remember, never try to cook raw food in a chafing dish. They are strictly for holding already-cooked food at a safe temperature. Different tools have different jobs; for instance, you wouldn't use a chafer to fry an egg, just like you'd be curious what a hot plate is used for when it comes to actual cooking tasks.
With your food nestled in place and the lid on, you're officially open for business.
Keeping Food at Safe Serving Temperatures
A chafing dish does more than just keep food warm; its most critical job is keeping that food safe. Holding food at the right temperature isn't just a best practice—it's a non-negotiable part of professional foodservice. This is where you separate the pros from the amateurs, moving from simply setting up a chafer to truly managing it.
The mission is simple: keep hot food hot. The moment food drops into the "temperature danger zone" between 40°F (4°C) and 140°F (60°C), you’re in trouble. Harmful bacteria can start multiplying like crazy. Your chafing dish is your first and best line of defense, making sure every plate you serve is as safe as it is delicious.
Mastering Temperature Control in Real Time
Managing temperature isn't a "set it and forget it" game. It’s an active, hands-on process, especially if you're using fuel-powered chafers. Electric models give you a bit more control, but they still need to be watched to make sure they're doing their job throughout the event.
Here's what you need to be doing during service:
- Probe Your Food Regularly: Get yourself a good, calibrated digital food thermometer and check the internal temperature of the food in a few different spots. Do this at least once an hour. You're aiming for a consistent reading above 140°F (60°C).
- Adjust Fuel Dampers: Most fuel holders have a little swiveling lid or damper. If you notice your food is getting a little too hot, just slide it partially closed to shrink the flame. Not hot enough? Open it up.
- Dial in Electric Settings: If you’re using electric chafers, get to know your equipment. A delicate cream sauce will scorch on the same high setting that a hearty beef stew needs to stay hot. A little practice goes a long way.
Food safety authorities are clear on this: hot foods absolutely must be held at or above 140°F (60°C) to stop bacterial growth. If food sits below that temp for more than a couple of hours, the risk skyrockets. That’s why the pros either use electric units with dependable thermostats or are constantly checking their fuel-heated chafers.
Essential Safety Rules During Service
It's not just about the food temperature; your whole service area needs to be safe. A busy buffet line is a chaotic environment, and it’s easy to overlook small things that can lead to accidents or wrecked equipment. From your commercial refrigerators to the serving line, everything needs to be in top shape.
Speaking of which, temperature safety starts long before the chafer. If your cold storage isn't right, you're already behind. For a full rundown, check out our guide on maintaining the proper walk-in cooler temperatures.
Here are a few rules you can't afford to break:
- Never Let the Water Pan Go Dry: This is probably the most common—and most damaging—mistake you can make. A dry water pan means scorched food, warped pans, and a serious fire risk. Check the water level every hour and top it off with hot water to avoid dropping the food temp.
- Keep the Area Clear: Make sure there's nothing flammable near or under your chafers. Napkins, decorations, and paper products need to be kept at a safe distance. Give each unit at least a foot of clear space all around.
- Use Lids Strategically: Keep the lids on as much as you can. It’s the easiest way to trap heat and moisture, which keeps the temperature steady and stops your food from drying out into shoe leather.
- Handle Fuel with Extreme Care: Never, ever try to refill or swap out a fuel canister while it’s lit. Put the flame out completely, let the holder cool down for a minute, and then switch out the can.
Service Breakdown and Equipment Care
The last guest might be gone, but the work isn't quite over. How you break down and care for your equipment is what separates amateur gear from professional, long-lasting investments. This final phase is all about protecting your chafing dishes so they're pristine and ready for the next event.
Even during service, a few simple actions can make a big difference later. Give the food a stir every so often to keep a skin from forming and to make sure everything stays evenly heated. It's also critical to use dedicated utensils for each chafer to prevent cross-contamination—a basic but essential food safety practice.
Safe Disassembly and Cleaning
When the event wraps up, safety comes first. Always extinguish the fuel sources with the snuffer cap. Let the fuel holders and cans cool down completely before you even think about touching them. Trying to move a hot chafing dish still filled with food and scalding water is a recipe for disaster.
Here’s the breakdown order I always follow:
- First, get the food pan out and store any leftovers properly.
- Next, carefully lift out the water pan and empty it.
- Once everything has cooled, remove the fuel holder and dispose of the empty canister based on your local regulations.
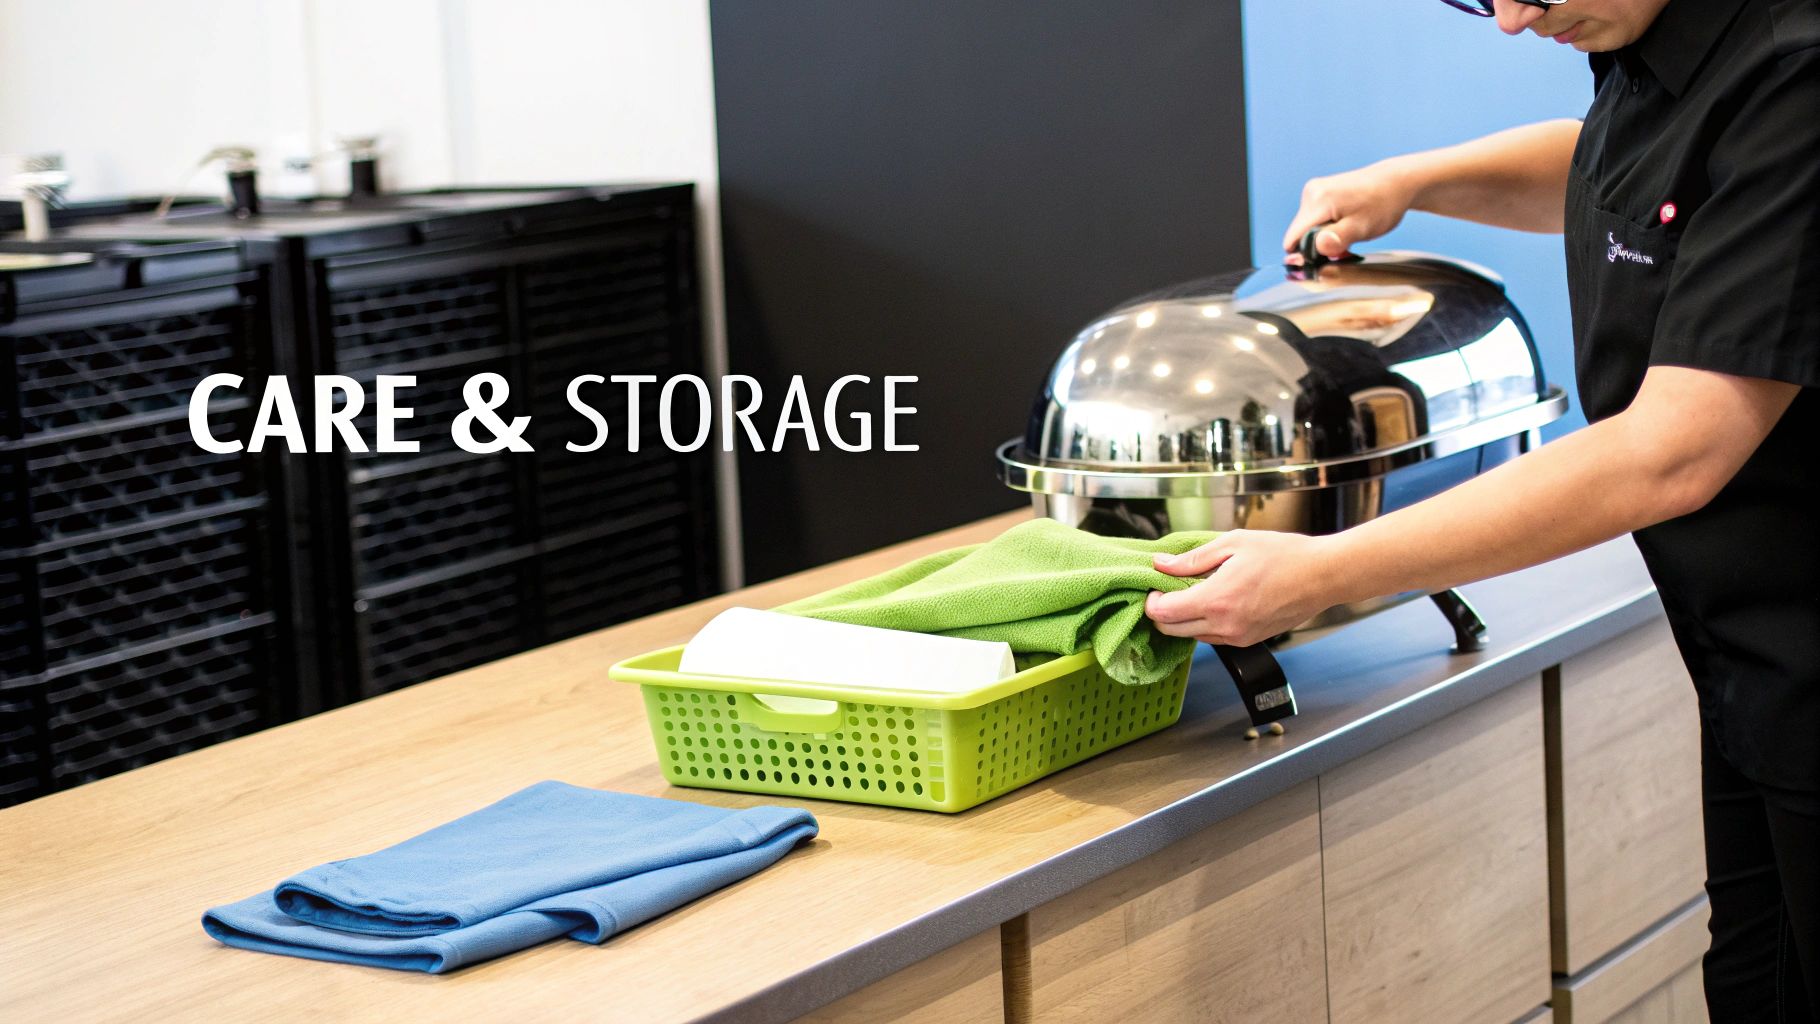
Cleaning stainless steel the right way is key to keeping that professional shine. Stick to a soft cloth or sponge with warm, soapy water. Whatever you do, avoid steel wool or abrasive cleaners. They’ll scratch the surface, creating tiny hiding spots for bacteria and eventually leading to rust.
For that stubborn, baked-on gunk, just let the pan soak in hot, soapy water. Don't resort to harsh scrubbing. A well-maintained chafer reflects the quality of your entire operation, from your Seattle bar equipment to your main cooking line.
Protecting Your Equipment for the Long Haul
Proper storage is the final, crucial step. Make sure every single piece—the frame, pans, and lid—is completely dry before you put it away. This prevents those annoying water spots and, more importantly, corrosion.
When you're storing them alongside other big assets like your commercial refrigerators and deep fryers, you need to be organized to prevent dents and scratches.
Stack the pans neatly inside one another and collapse the frame if it's designed to do so. This doesn't just save a ton of precious storage space; it also protects the more delicate parts from getting damaged. Consistent care ensures your chafing dishes, just like your reliable pizza prep tables and under counter freezers, will remain a dependable part of your foodservice arsenal for years.
Common Questions About Chafing Dishes
Even seasoned pros have questions about the finer points of using chafing dishes. Getting quick, reliable answers can make the difference between a smooth service and a last-minute scramble. Here are the most common queries we hear from foodservice operators in Seattle and beyond.
How Much Water Should I Put in a Chafing Dish?
A good rule of thumb is to fill the water pan with about one inch (2.5 cm) of hot water. Using hot water right from the start is a huge time-saver. It lets your fuel or electric element focus on maintaining heat rather than wasting energy just warming up cold water.
The whole point is to create a consistent layer of steam for gentle, indirect heating. You'll want to check the water level every hour or so during service and top it up with more hot water as needed. This simple check prevents the pan from boiling dry, which can scorch your equipment and ruin the food.
Can You Cook Raw Food in a Chafing Dish?
Absolutely not. Chafing dishes are designed exclusively for holding and warming food that has already been fully cooked. Their gentle, indirect heat is nowhere near powerful enough to bring raw ingredients like chicken or ground beef up to safe internal temperatures.
Think of your chafing dish as the final stop for food coming from your commercial ovens or deep fryers. Trying to cook in a chafer is a serious food safety risk and will only result in undercooked, dangerous product for your guests.
What Is the Difference Between Gel and Wick Chafing Fuel?
The main differences really come down to their consistency, how they burn, and where you're using them. Understanding these helps you choose the right fuel for your specific event.
- Gel Fuel: This is a thick, ethanol-based substance that produces a hot, wide flame. It's great for heating the water pan quickly, but that wide flame can be less stable in breezy, outdoor conditions.
- Wick Fuel: This type uses a sealed can with a wick that draws up liquid diethylene glycol. It produces a more controlled, consistent flame that is less likely to get blown out by the wind. It's often considered safer because it's way less likely to spill if it gets tipped over.
How Do I Keep Food from Drying Out in a Chafer?
Preventing food from drying out is all about trapping moisture. The most effective way to do this is simply to keep the lid on the chafer whenever possible. This one simple action traps steam and humidity inside, keeping your food succulent.
Another pro tip is to make sure the water pan never runs dry. The steam it produces is your best defense against dryness. For dishes that are particularly prone to drying out—like pasta, rice, or sliced meats—you can add a bit of extra sauce, broth, or even just a little water directly to the food pan before service.
Don't forget to give the contents a stir every now and then. It helps redistribute both the heat and moisture, preventing the edges from getting hard and crusty.
From reliable commercial freezers and sandwich prep tables to the perfect chafer for your buffet line, Seattle Restaurant Equipment has the gear to make your foodservice operation a success. Explore our full catalog online.
Shop Commercial Kitchen Equipment at seattlerestaurantequipment.com